:: Mr. and Mrs. Fix It ::
:: Greater Bryan/College Station Area ::
We can handle all phases of your renovation,
patch any hole, and fix any leak!
From planning, tear out, upgrade and replacement,
to painting and finish out.
We do it all!
| Demolition | Construction |
|---|---|
| Complete Tear-Out | Decks, patios, pergolas |
| Haul away | Framing |
| Recycle if applicable | Light roofing |
| Small Concrete slabs | |
| Plumbing | Hardwood, parquet flooring |
| Sinks | Trim, Crown, Baseboards |
| Toilets | |
| Showers / Tubs | Electrical |
| Dishwasher installation | Wire Running |
| Washer / Dryer | Plugs and switches |
| Ceiling Fans / Chandeliers | |
| Painting / Staining | Technical Support |
| Sheetrock :: from patching to whole rooms | Wired networks :: (Cat 5e or Cat 6 Ethernet) |
| Float and texture | Coaxial cable |
| Painting | Telephone systems |
| Staining | HDMI, Speakers, etc. |
| == == == == | == == == == |
| Alan Hill | Missy Hill |
| 979-218-1554 | 979-436-1911 |
| alanh9898@gmail.com | mbinghamhill@gmail.com |
Call us, we can fix it!
$45/hr labor with a minimum charge of two hours, plus parts.
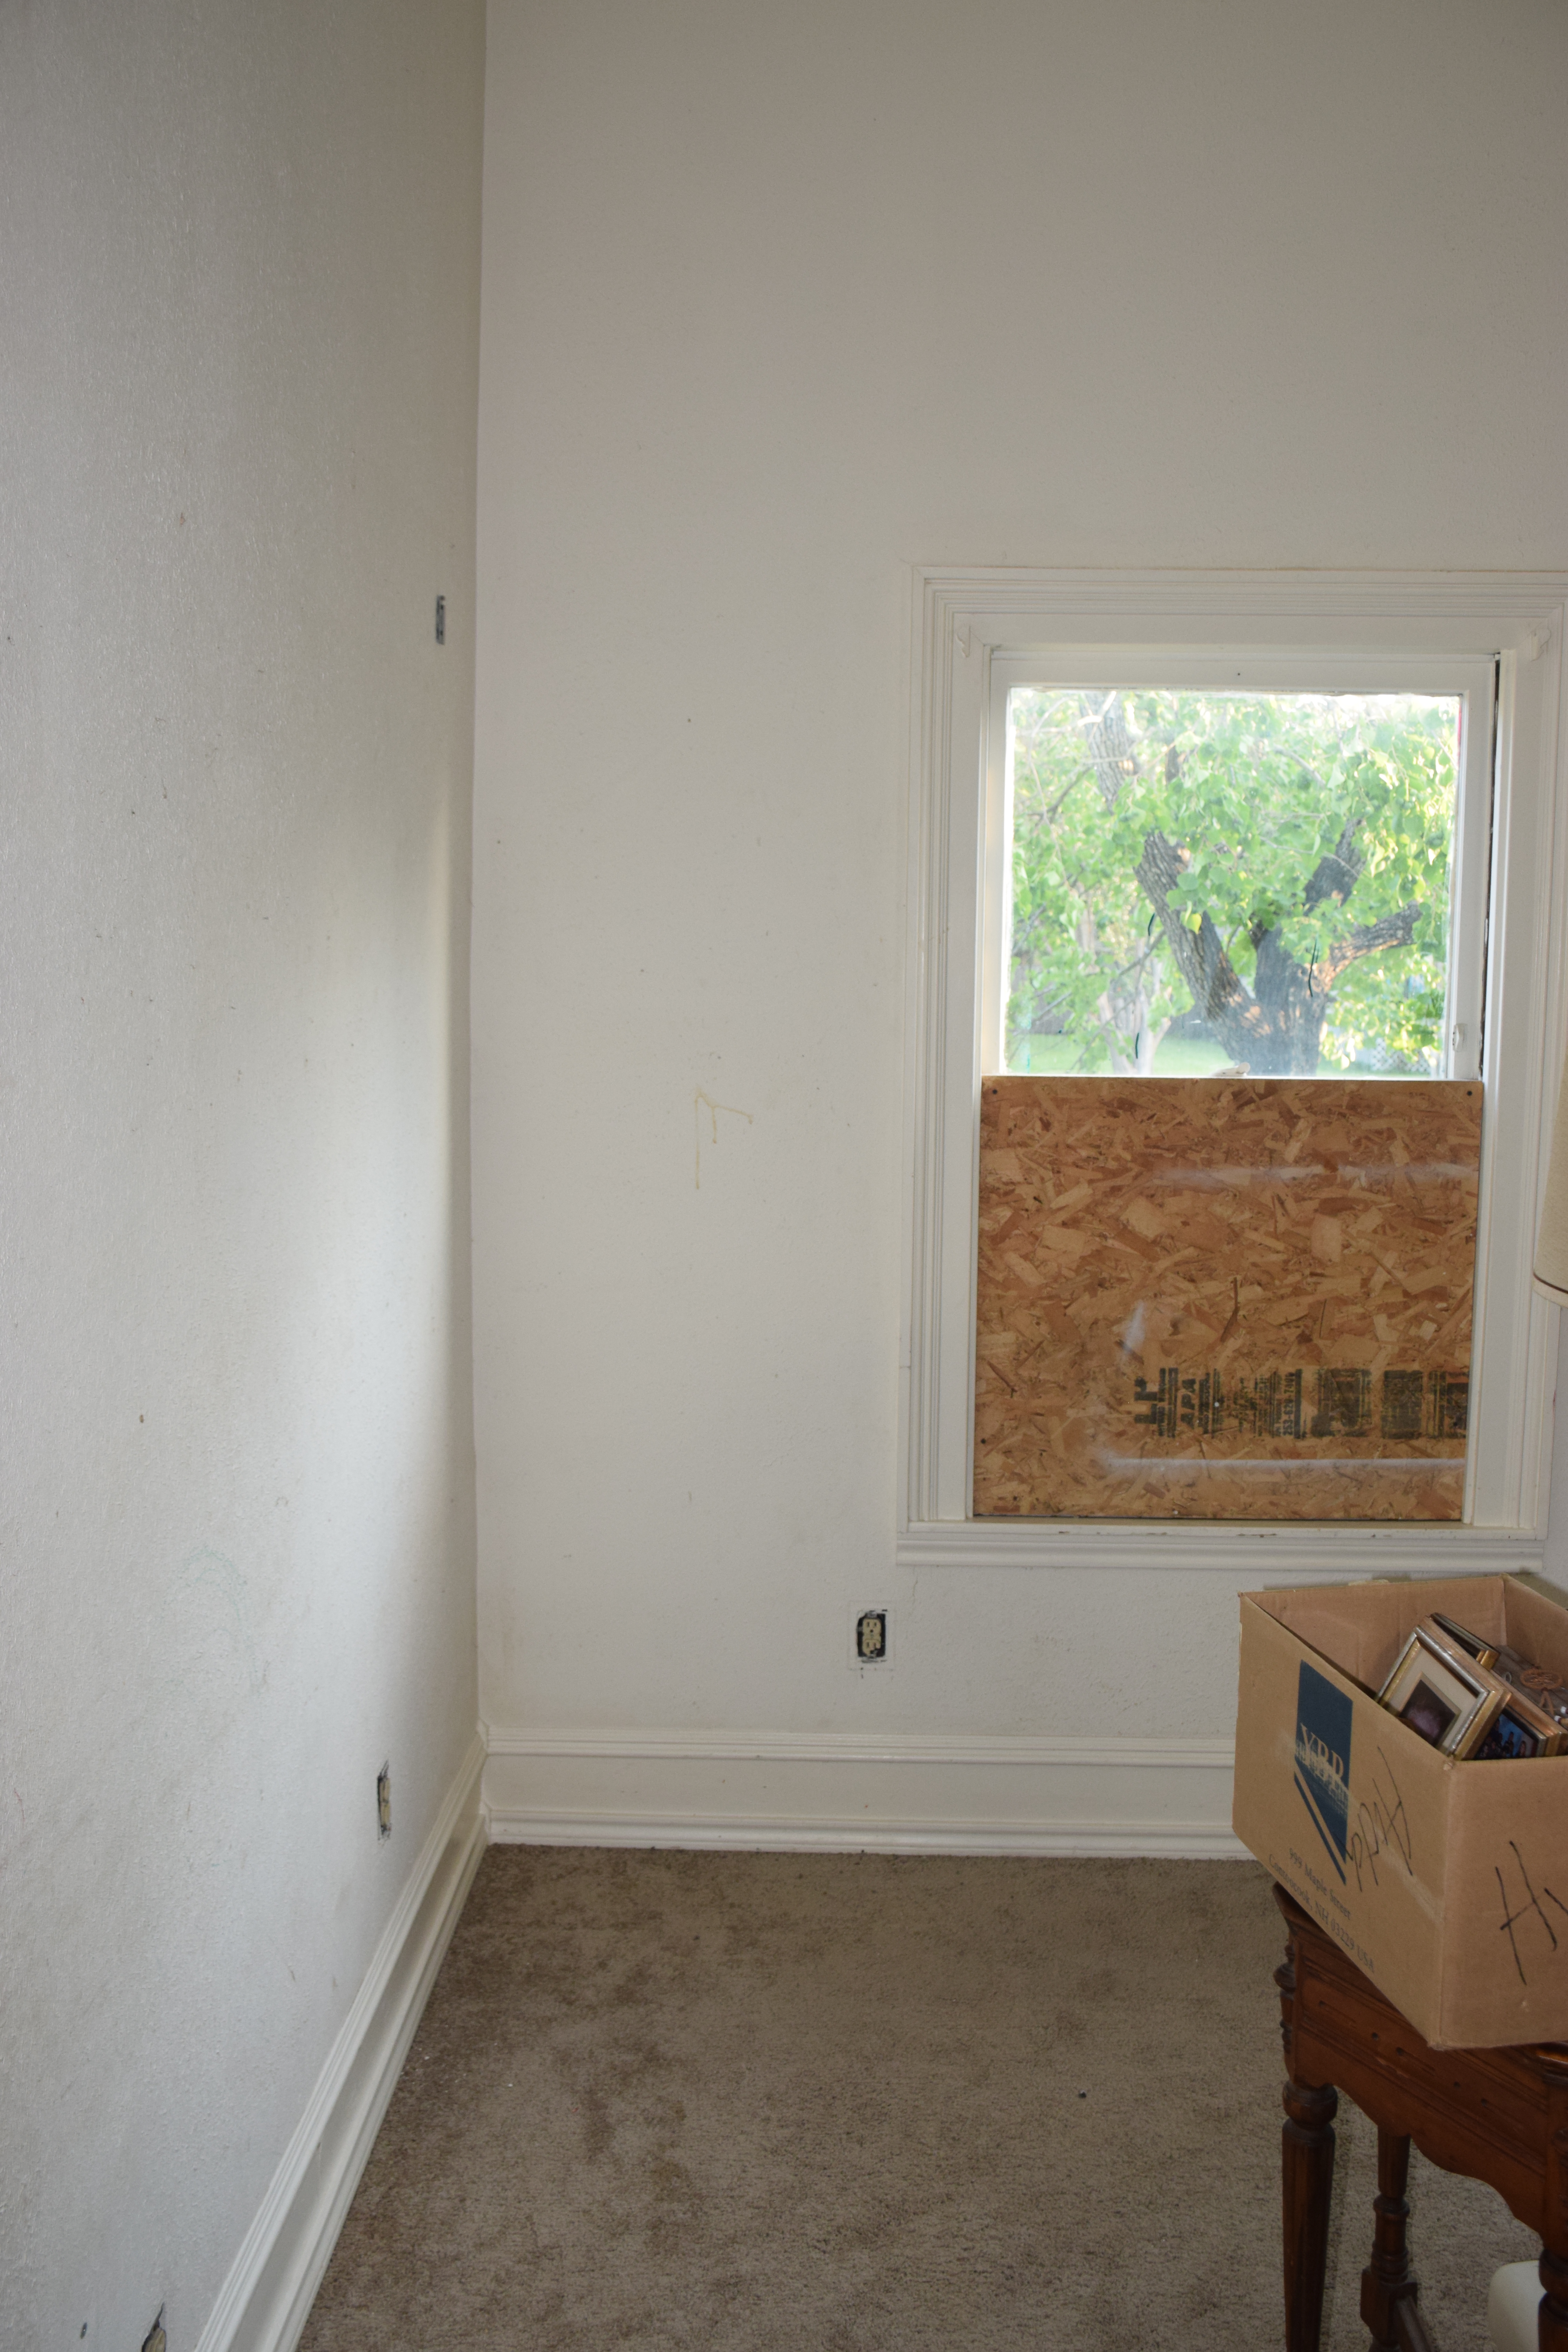
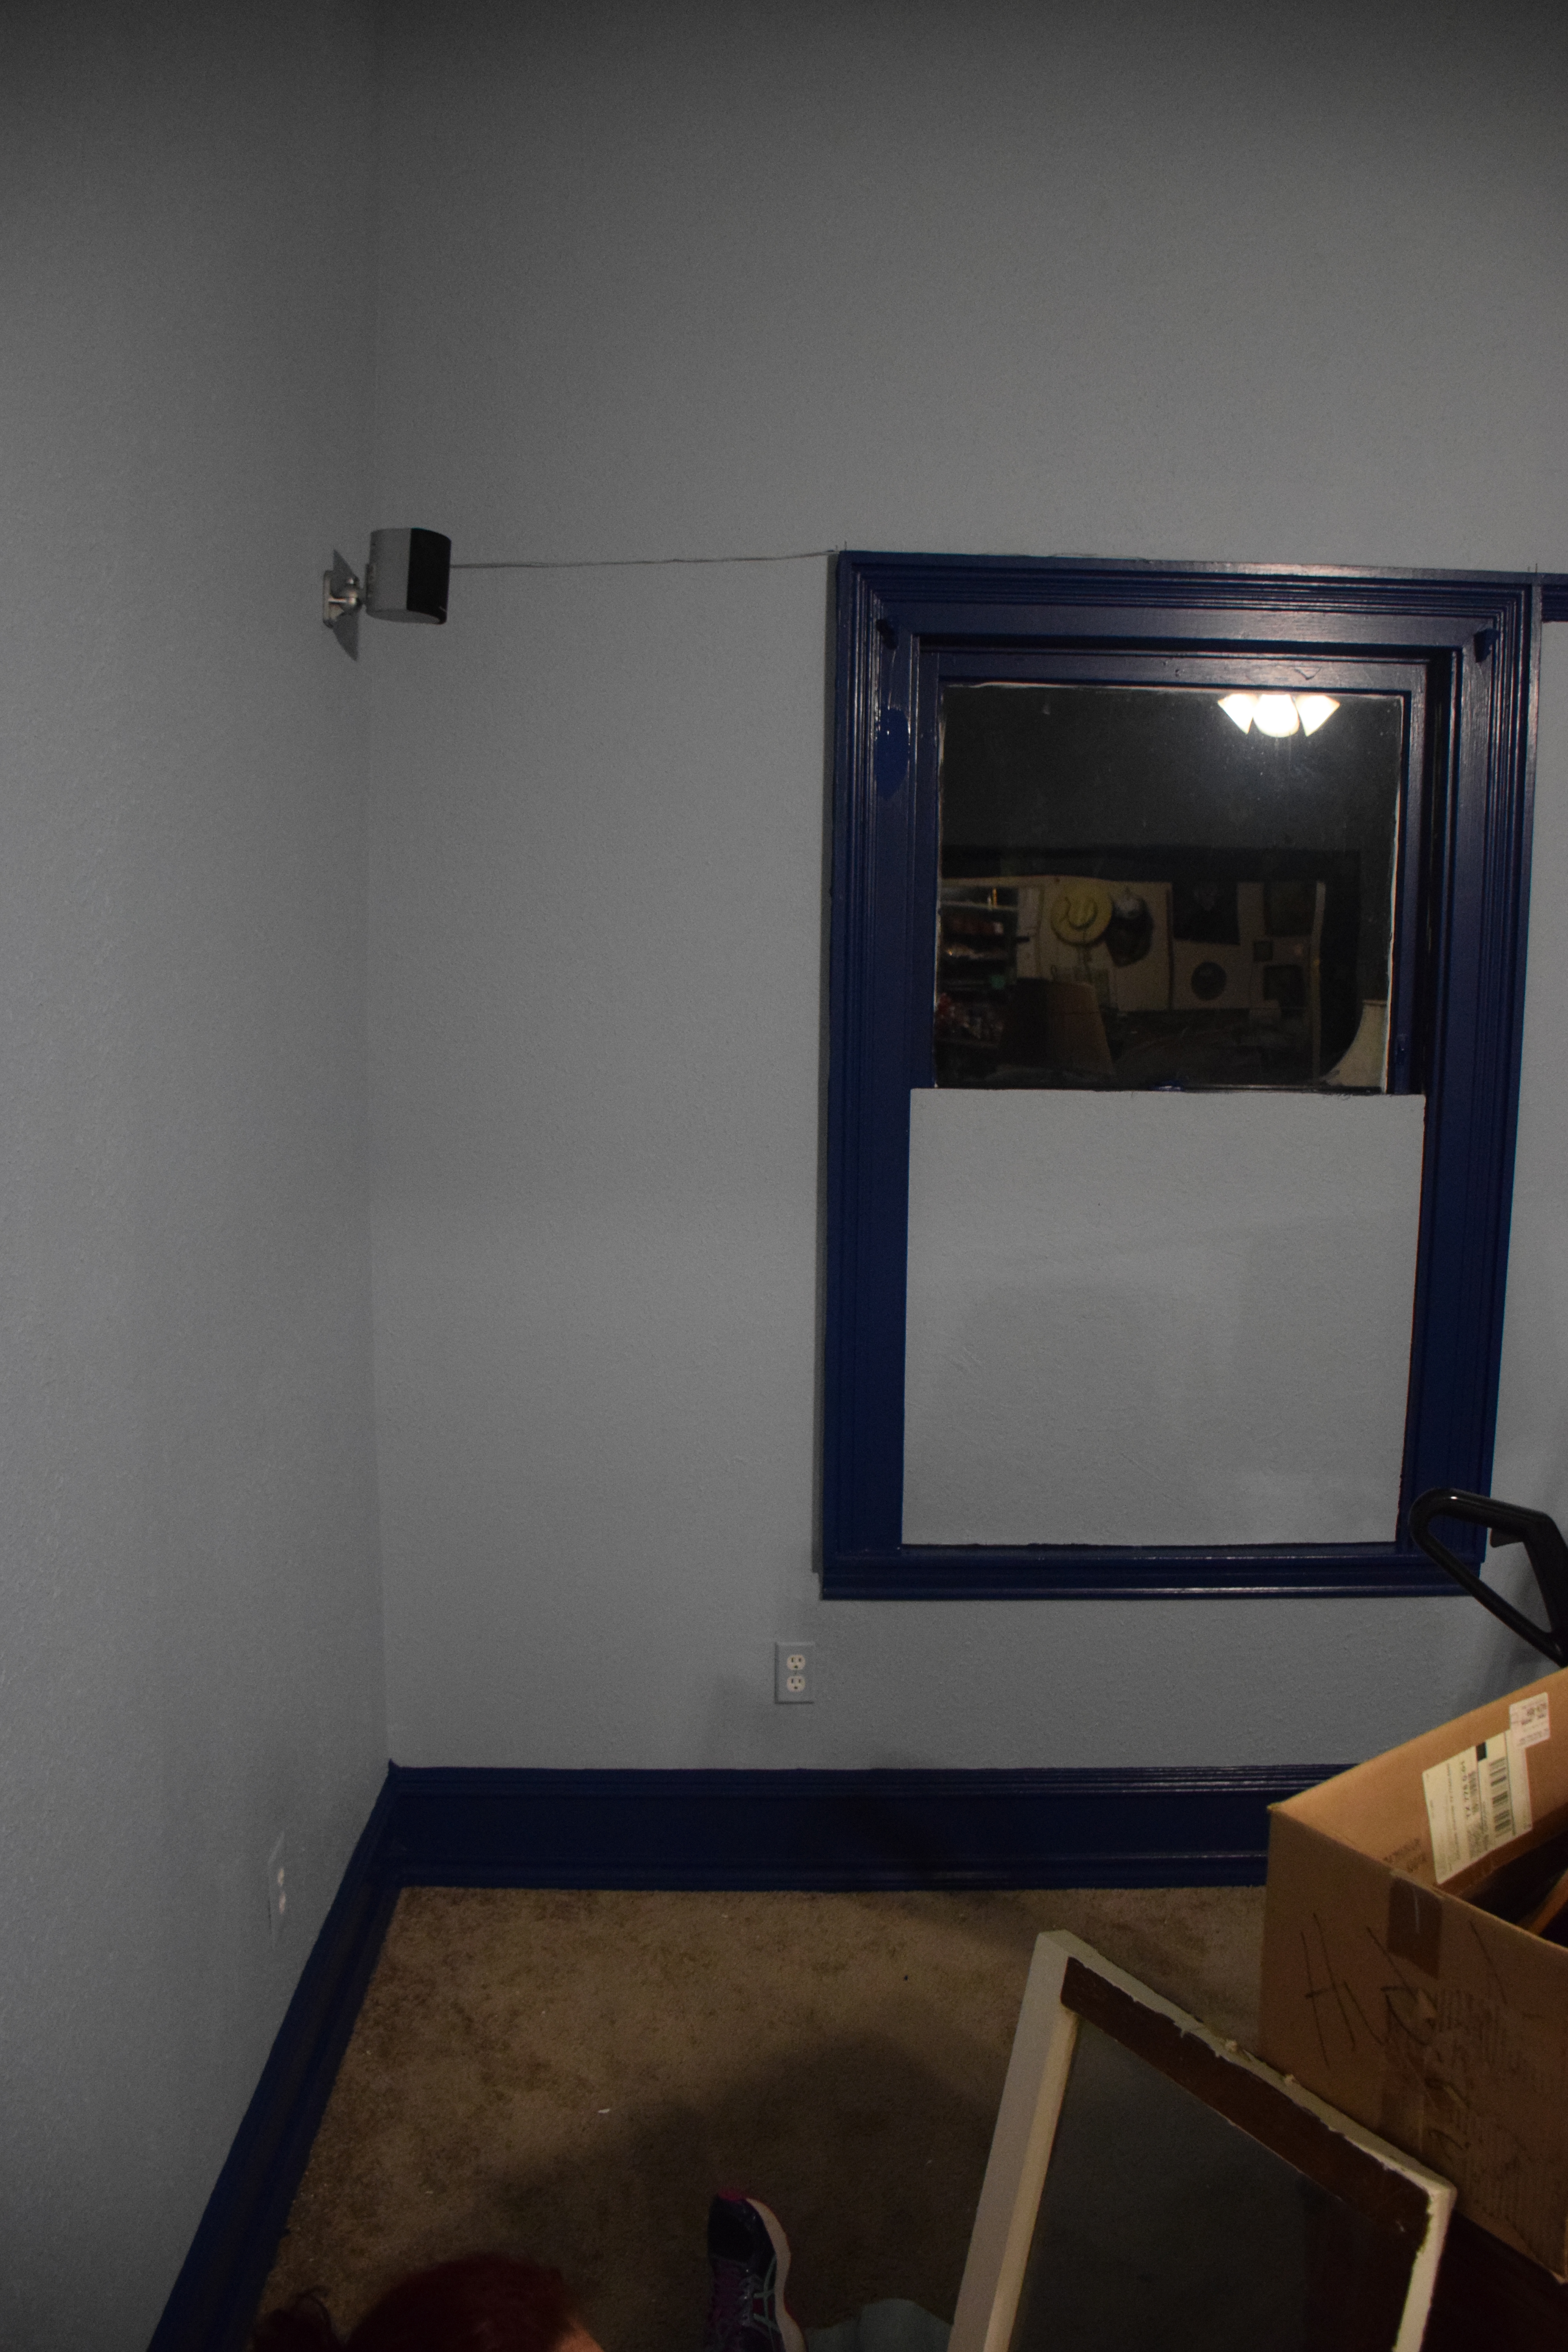
I did a job in August 2018 for a man with a Victorian house in Bryan. He has a north facing stained glass window protected by a piece of plexiglass. The window sill under the plexiglass has rotted out and was sagging. The sill underneath turned out to be a 2 by 10 board that went clear through to the inside trim under the stained glass. The client opted for the less elaborate job and I tore out only the rotten wood instead of removing the window and replacing the whole board. I filled in with a piece of ripped and shaped 2 by 4, then I ripped down a 1 by 6 to match the existing trim on the other three sides of the window and painted it to match.
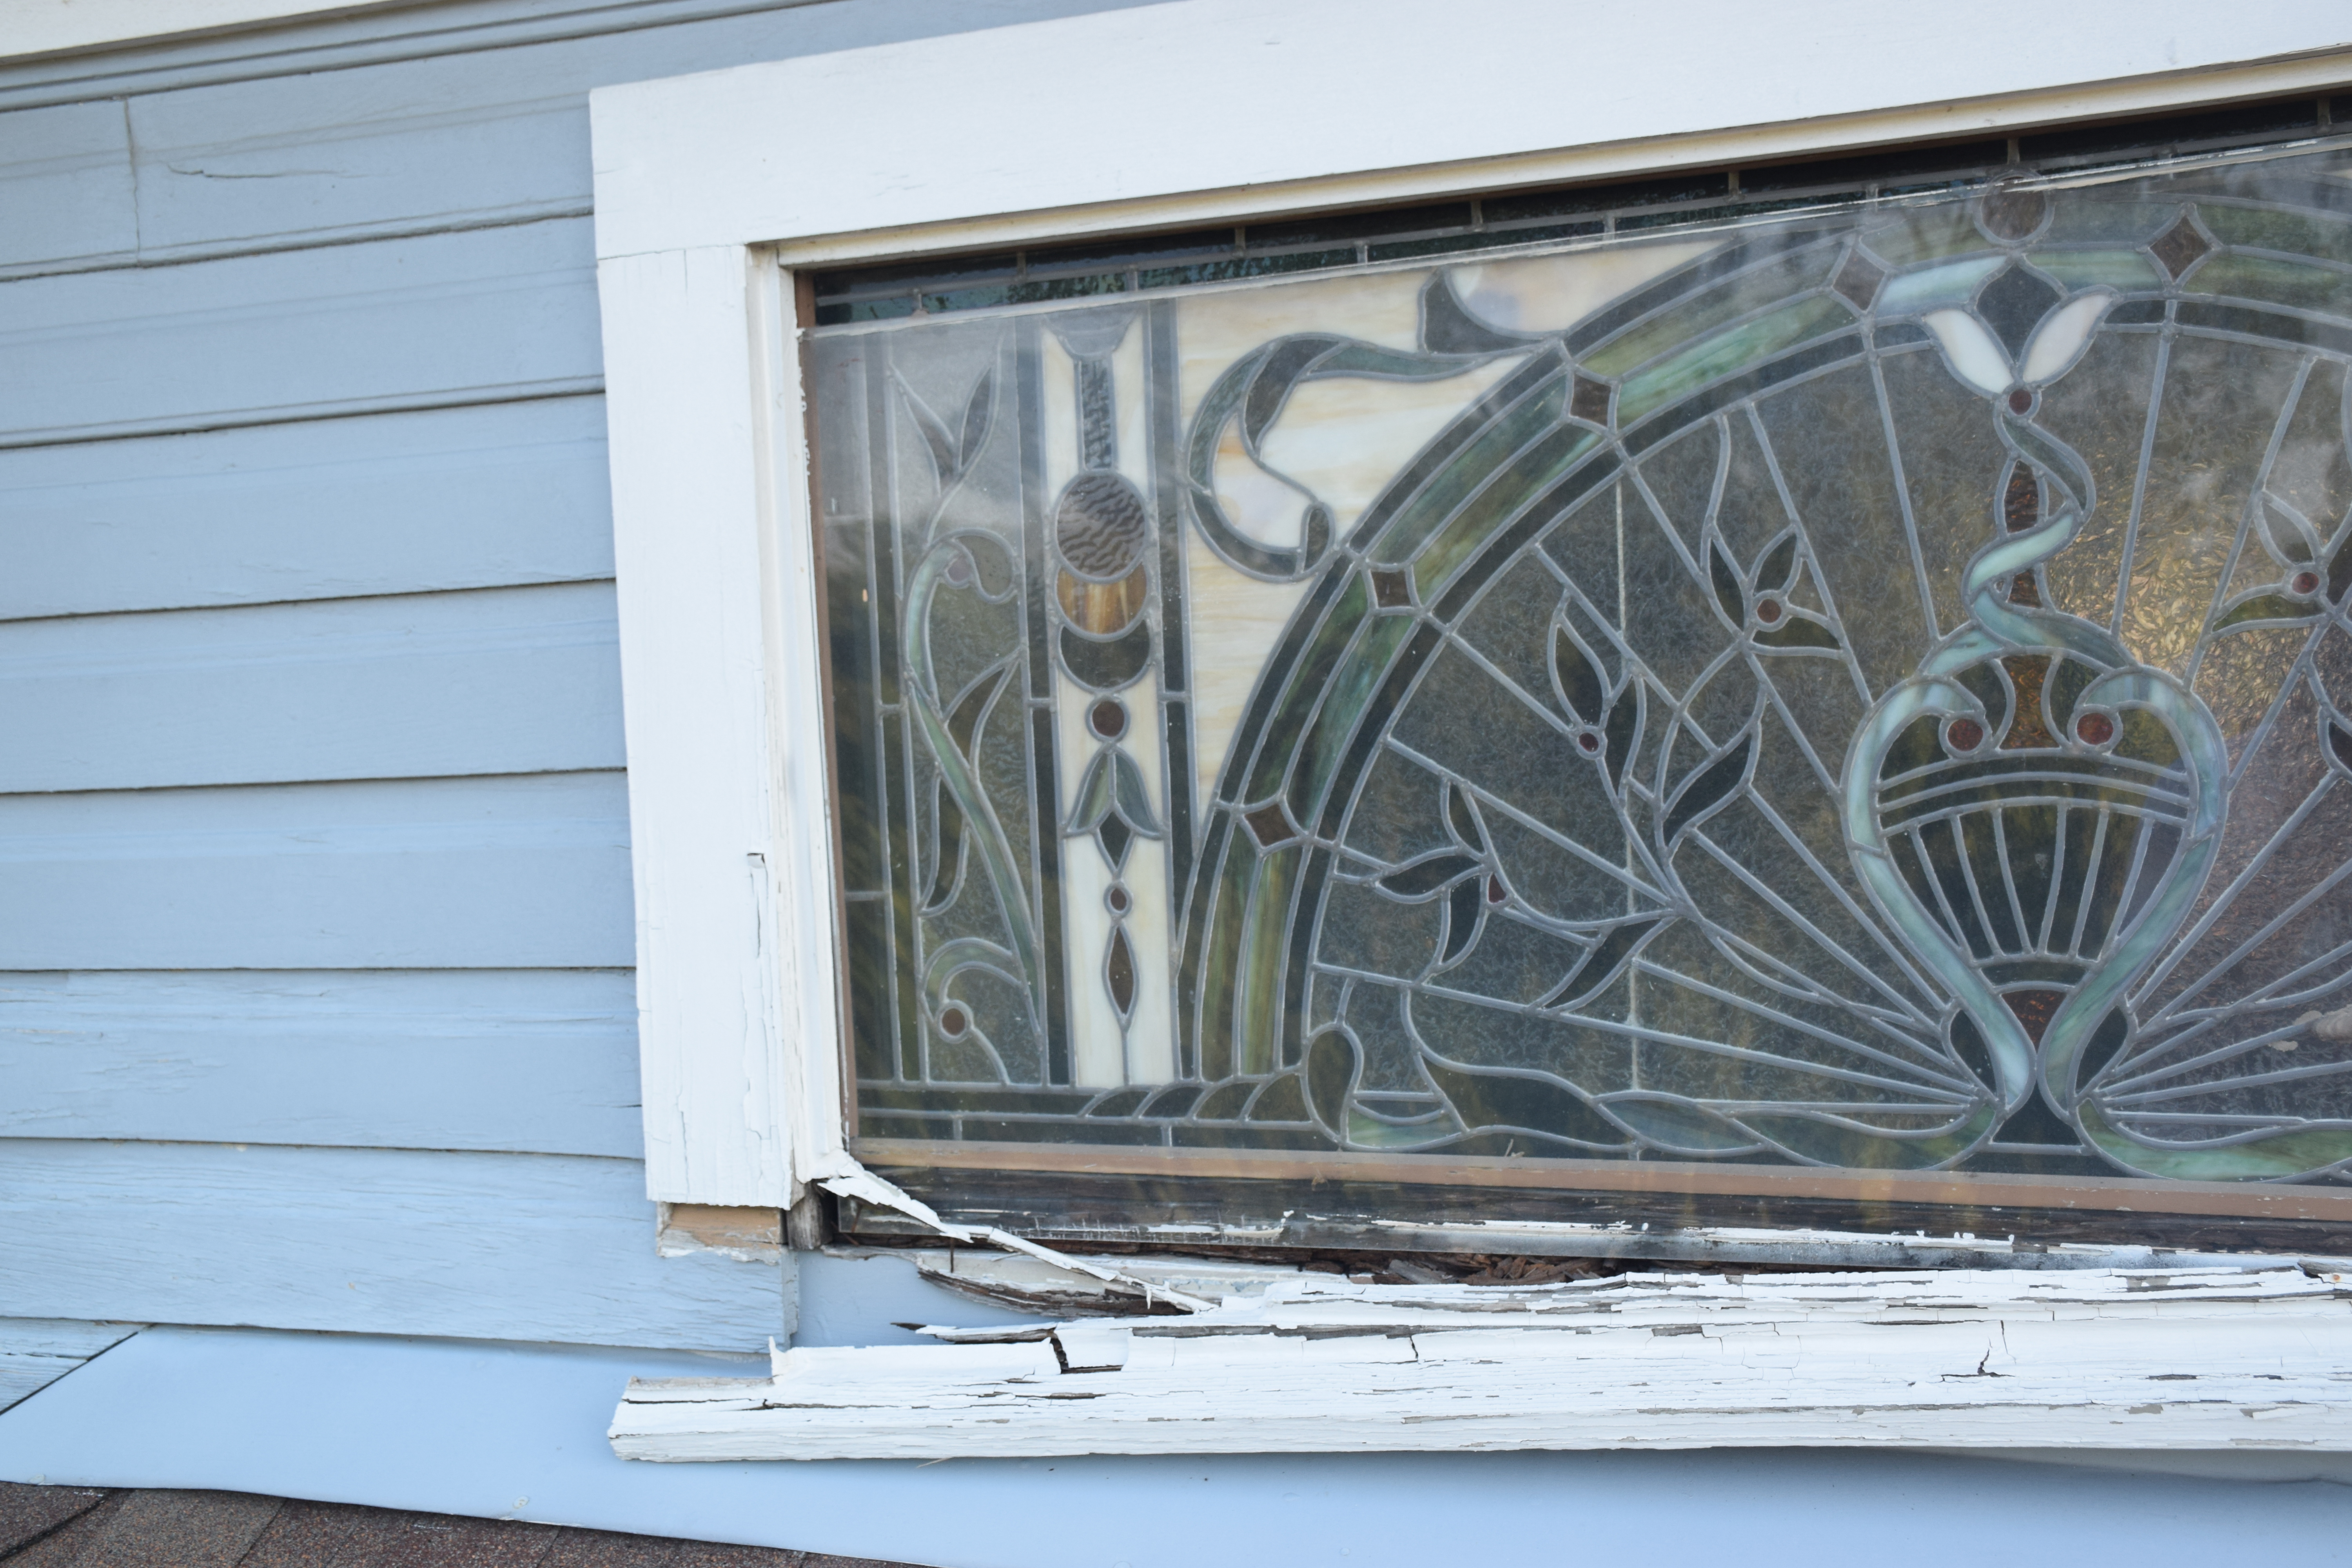 Window Before 1 |
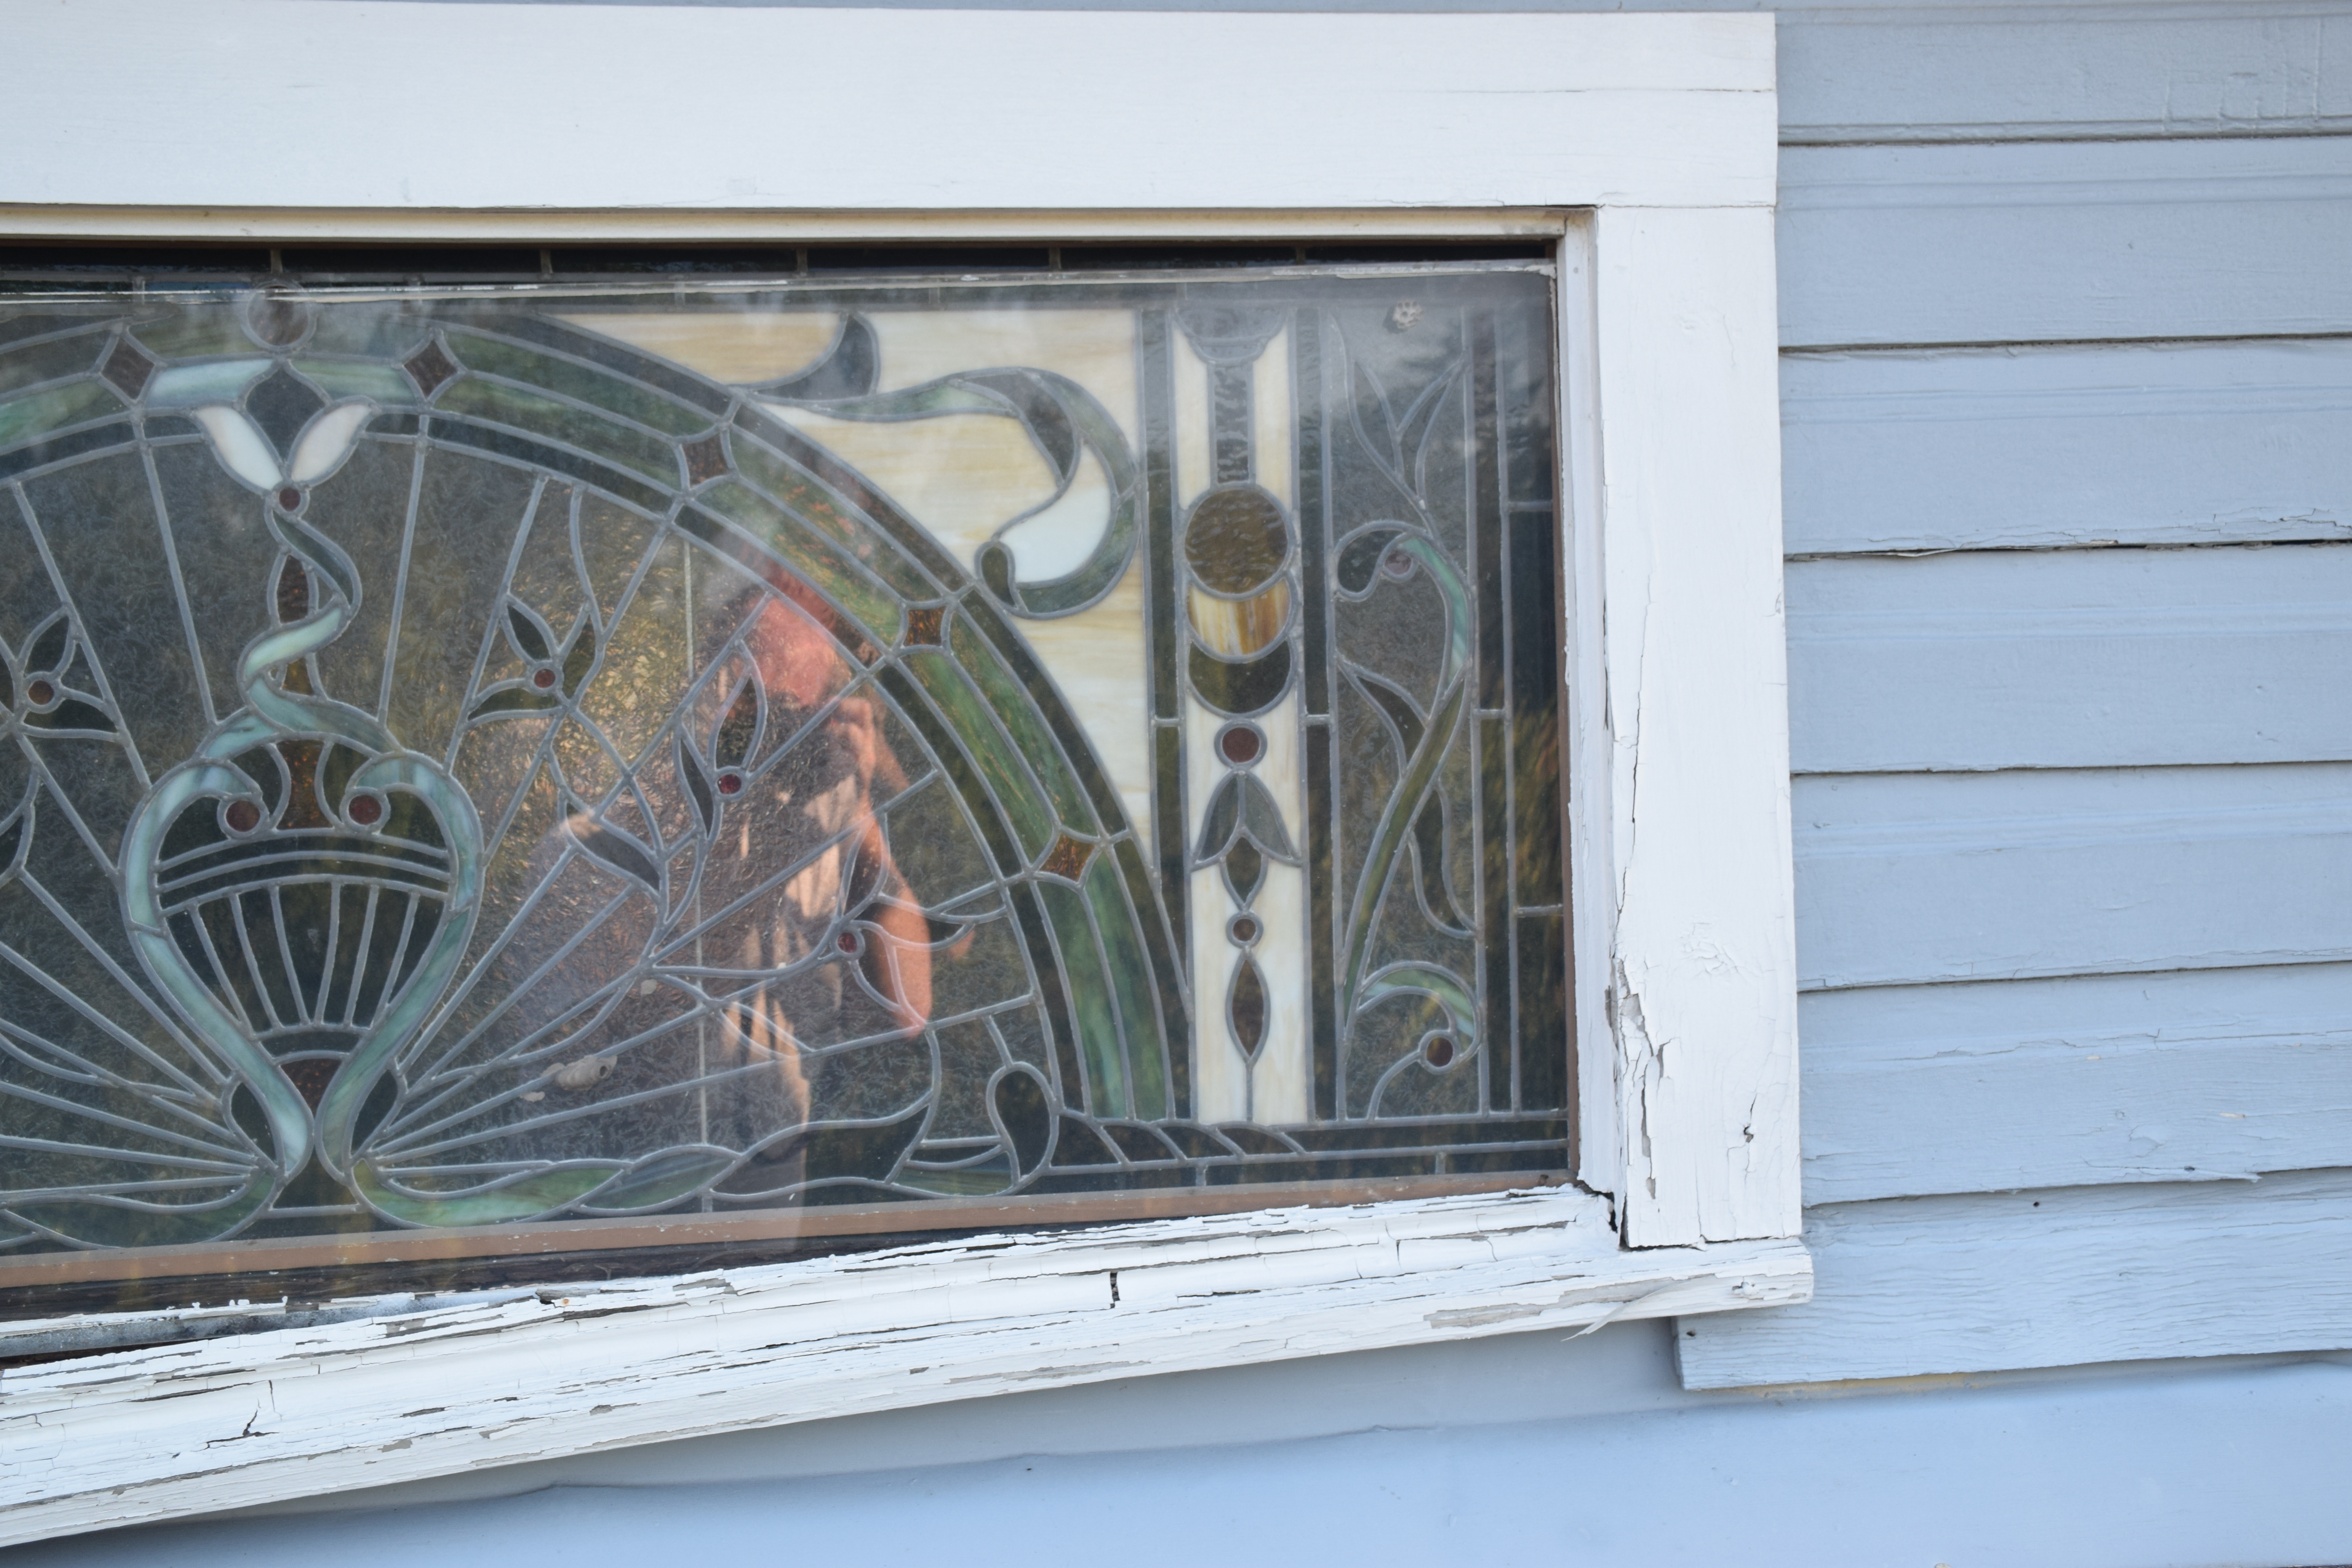 Window Before 2 |
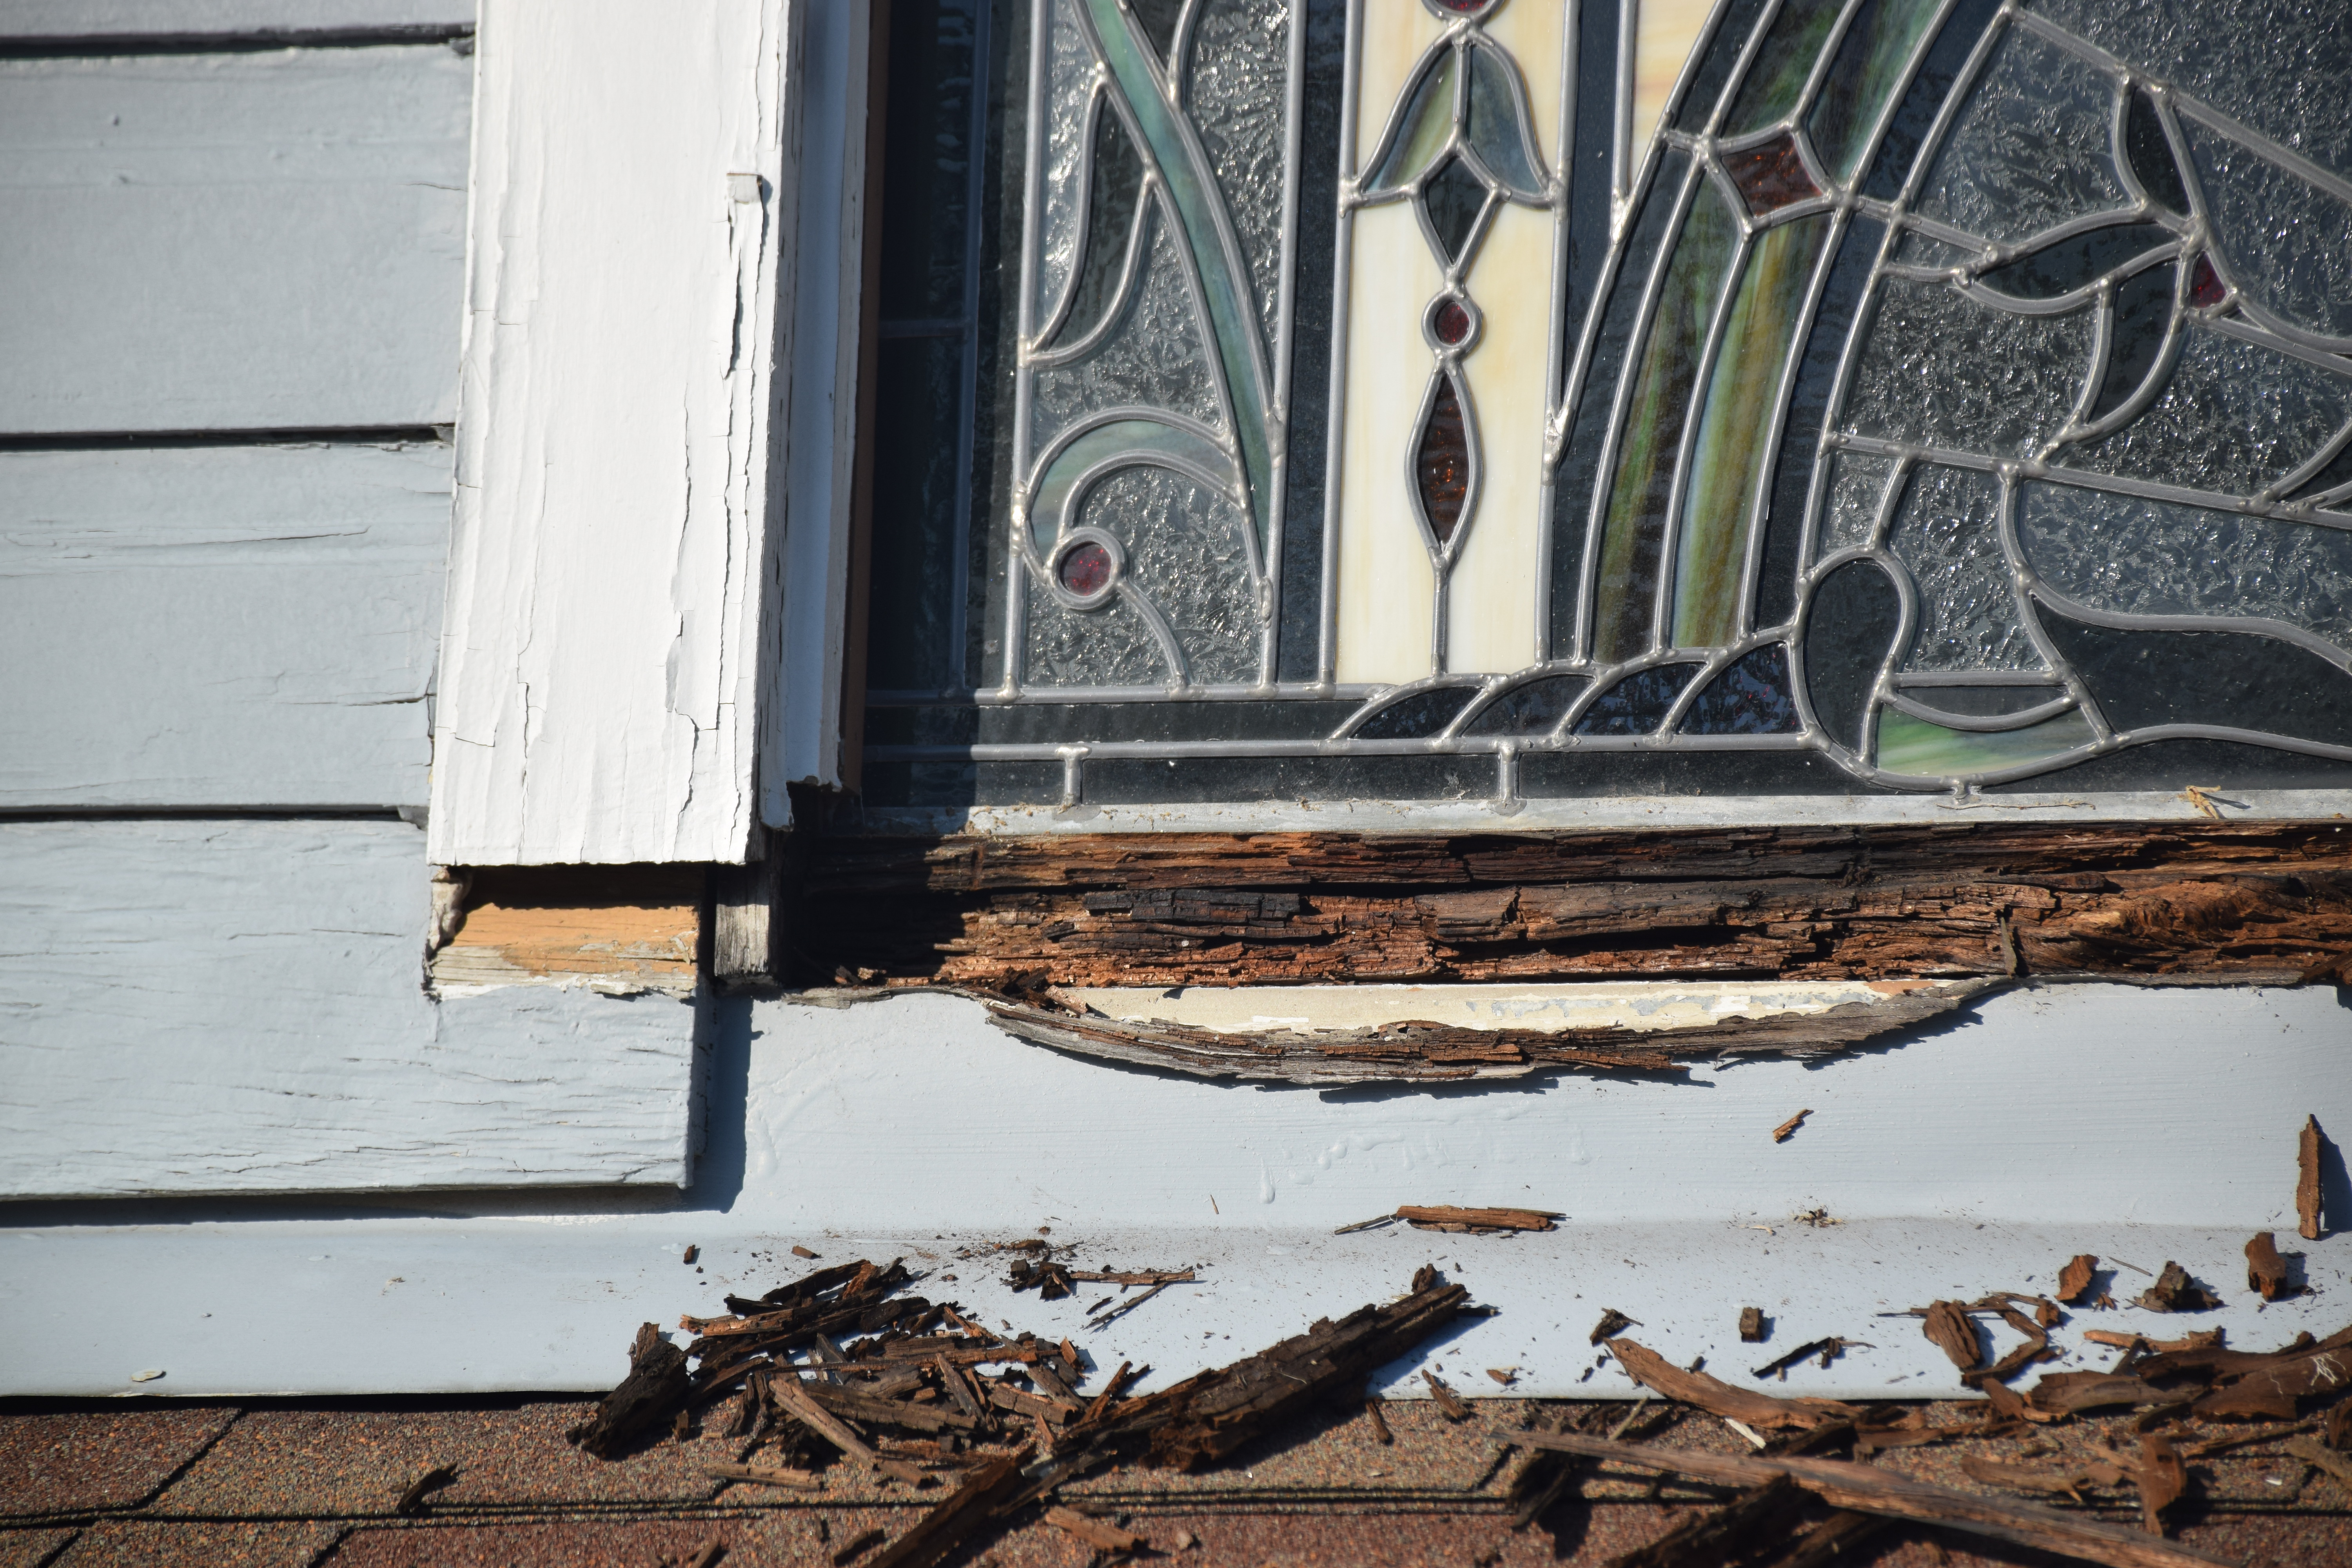 Window During 1 |
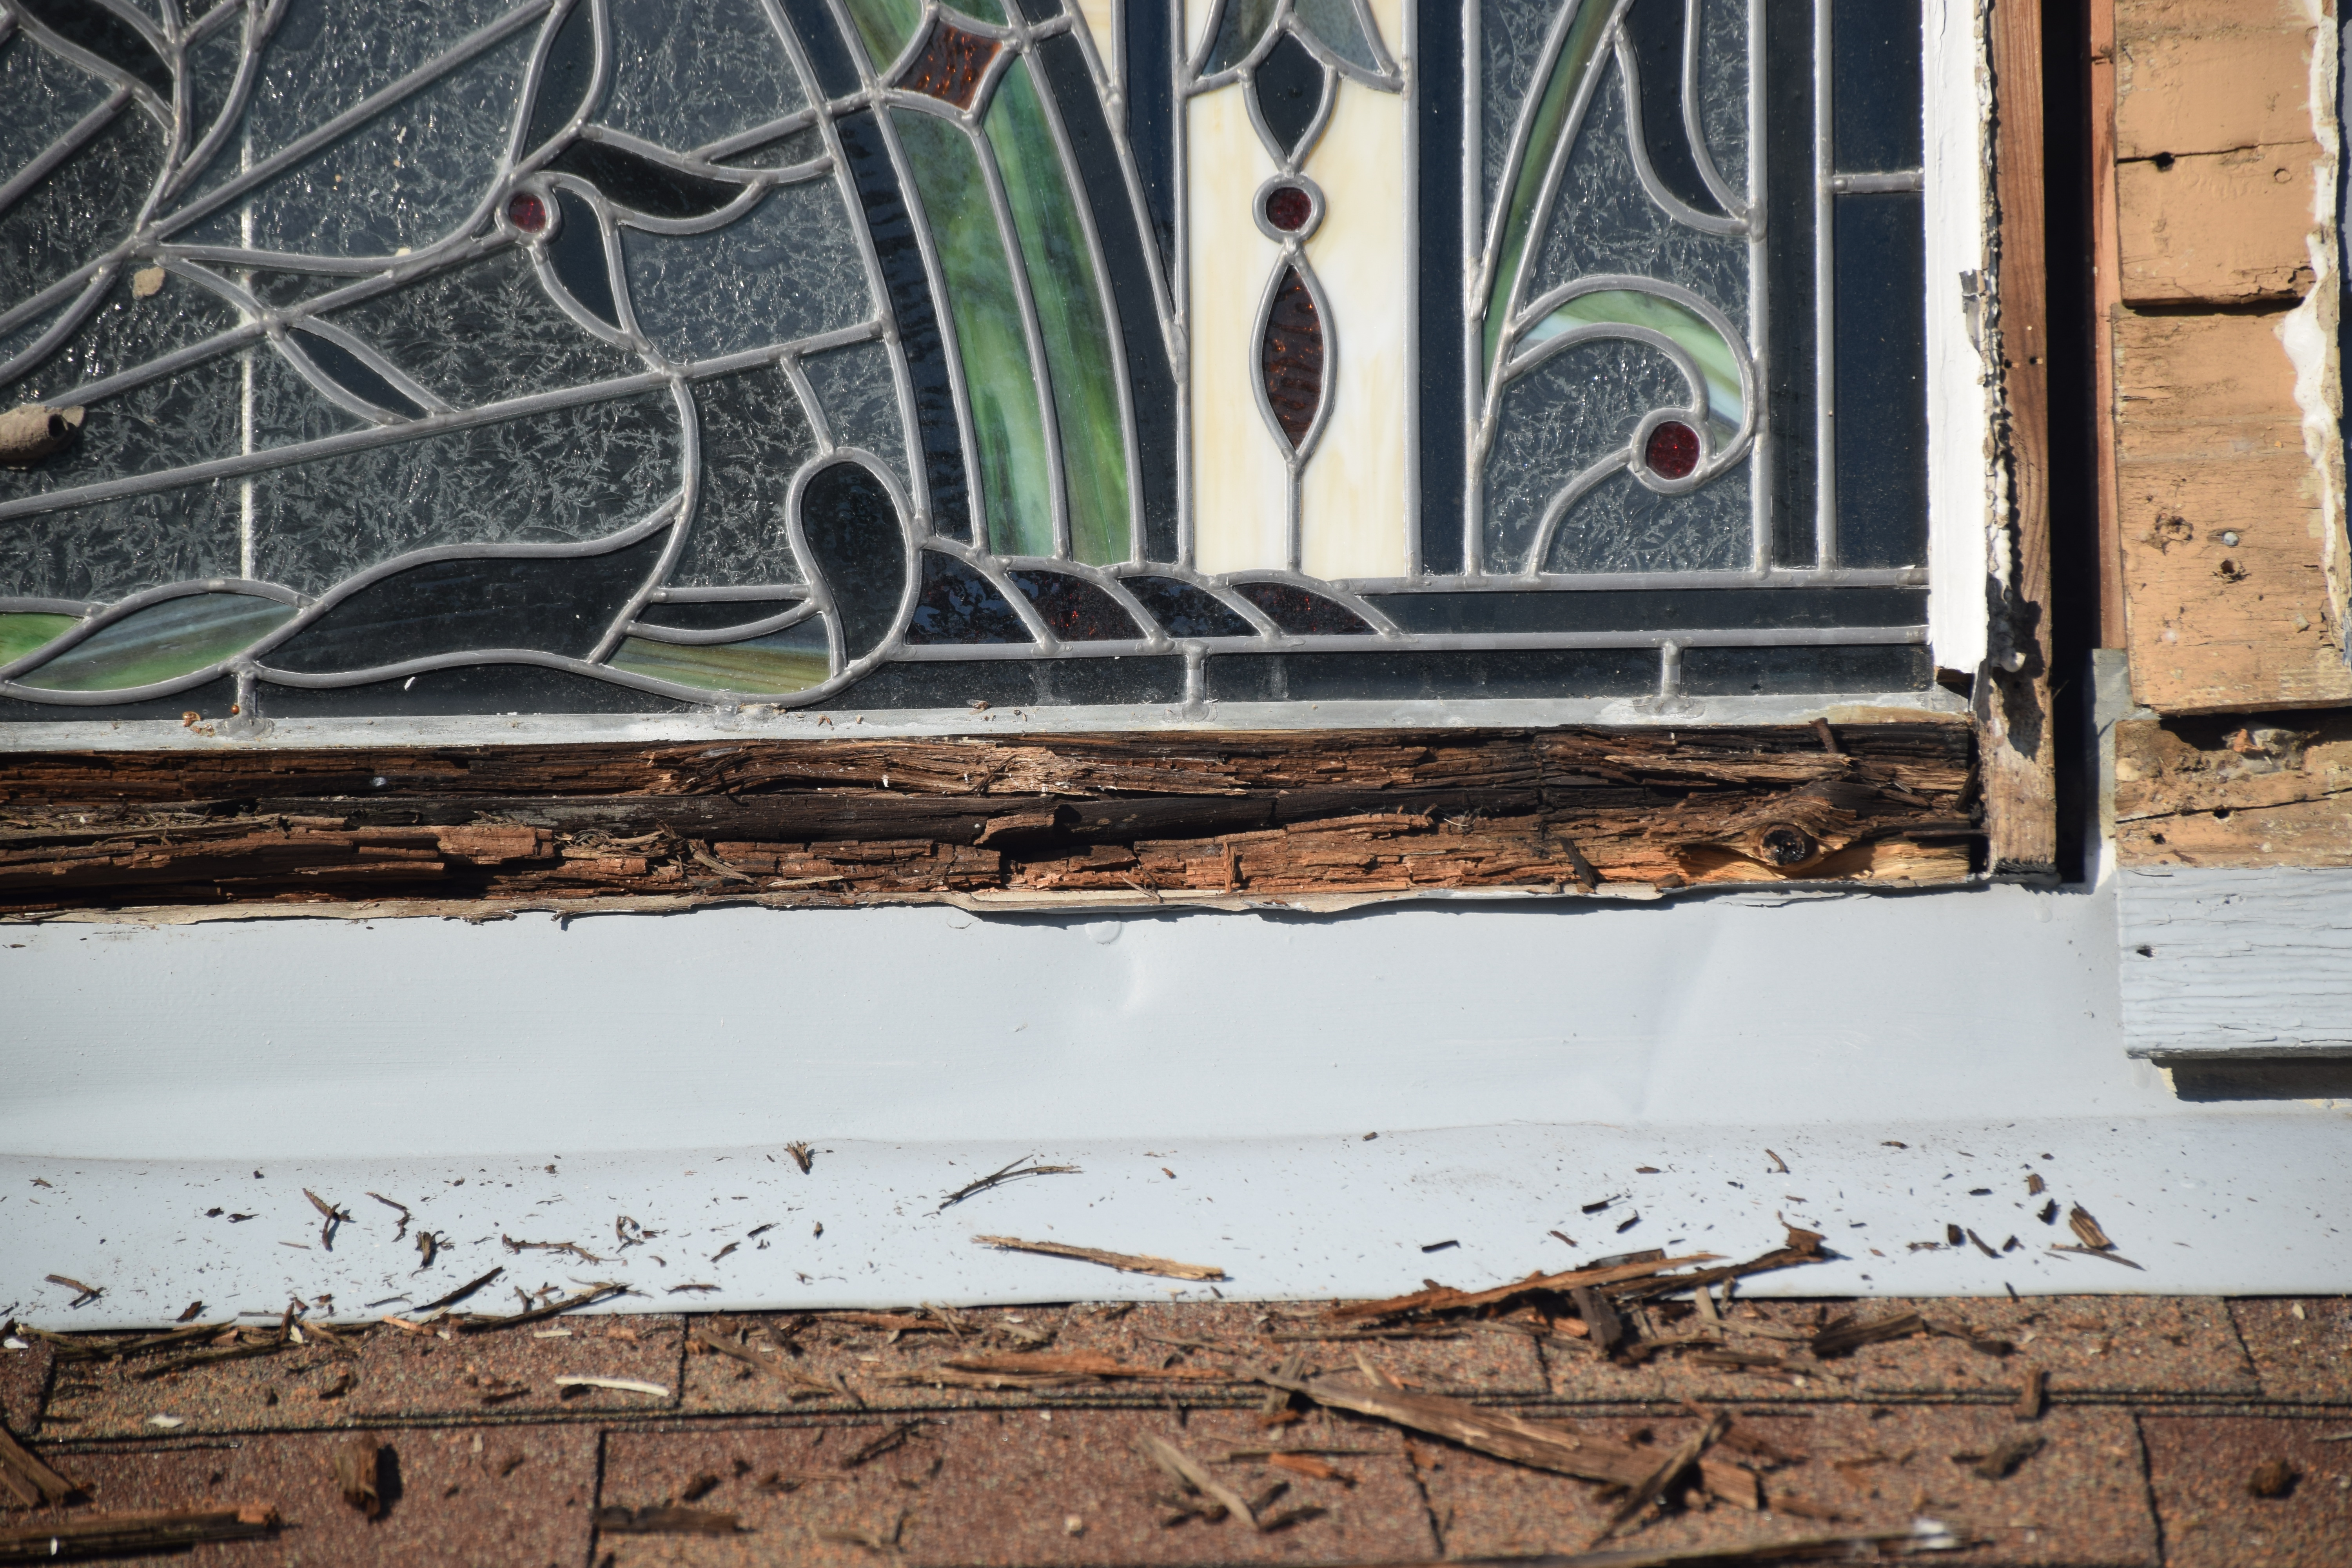 Window During 2 |
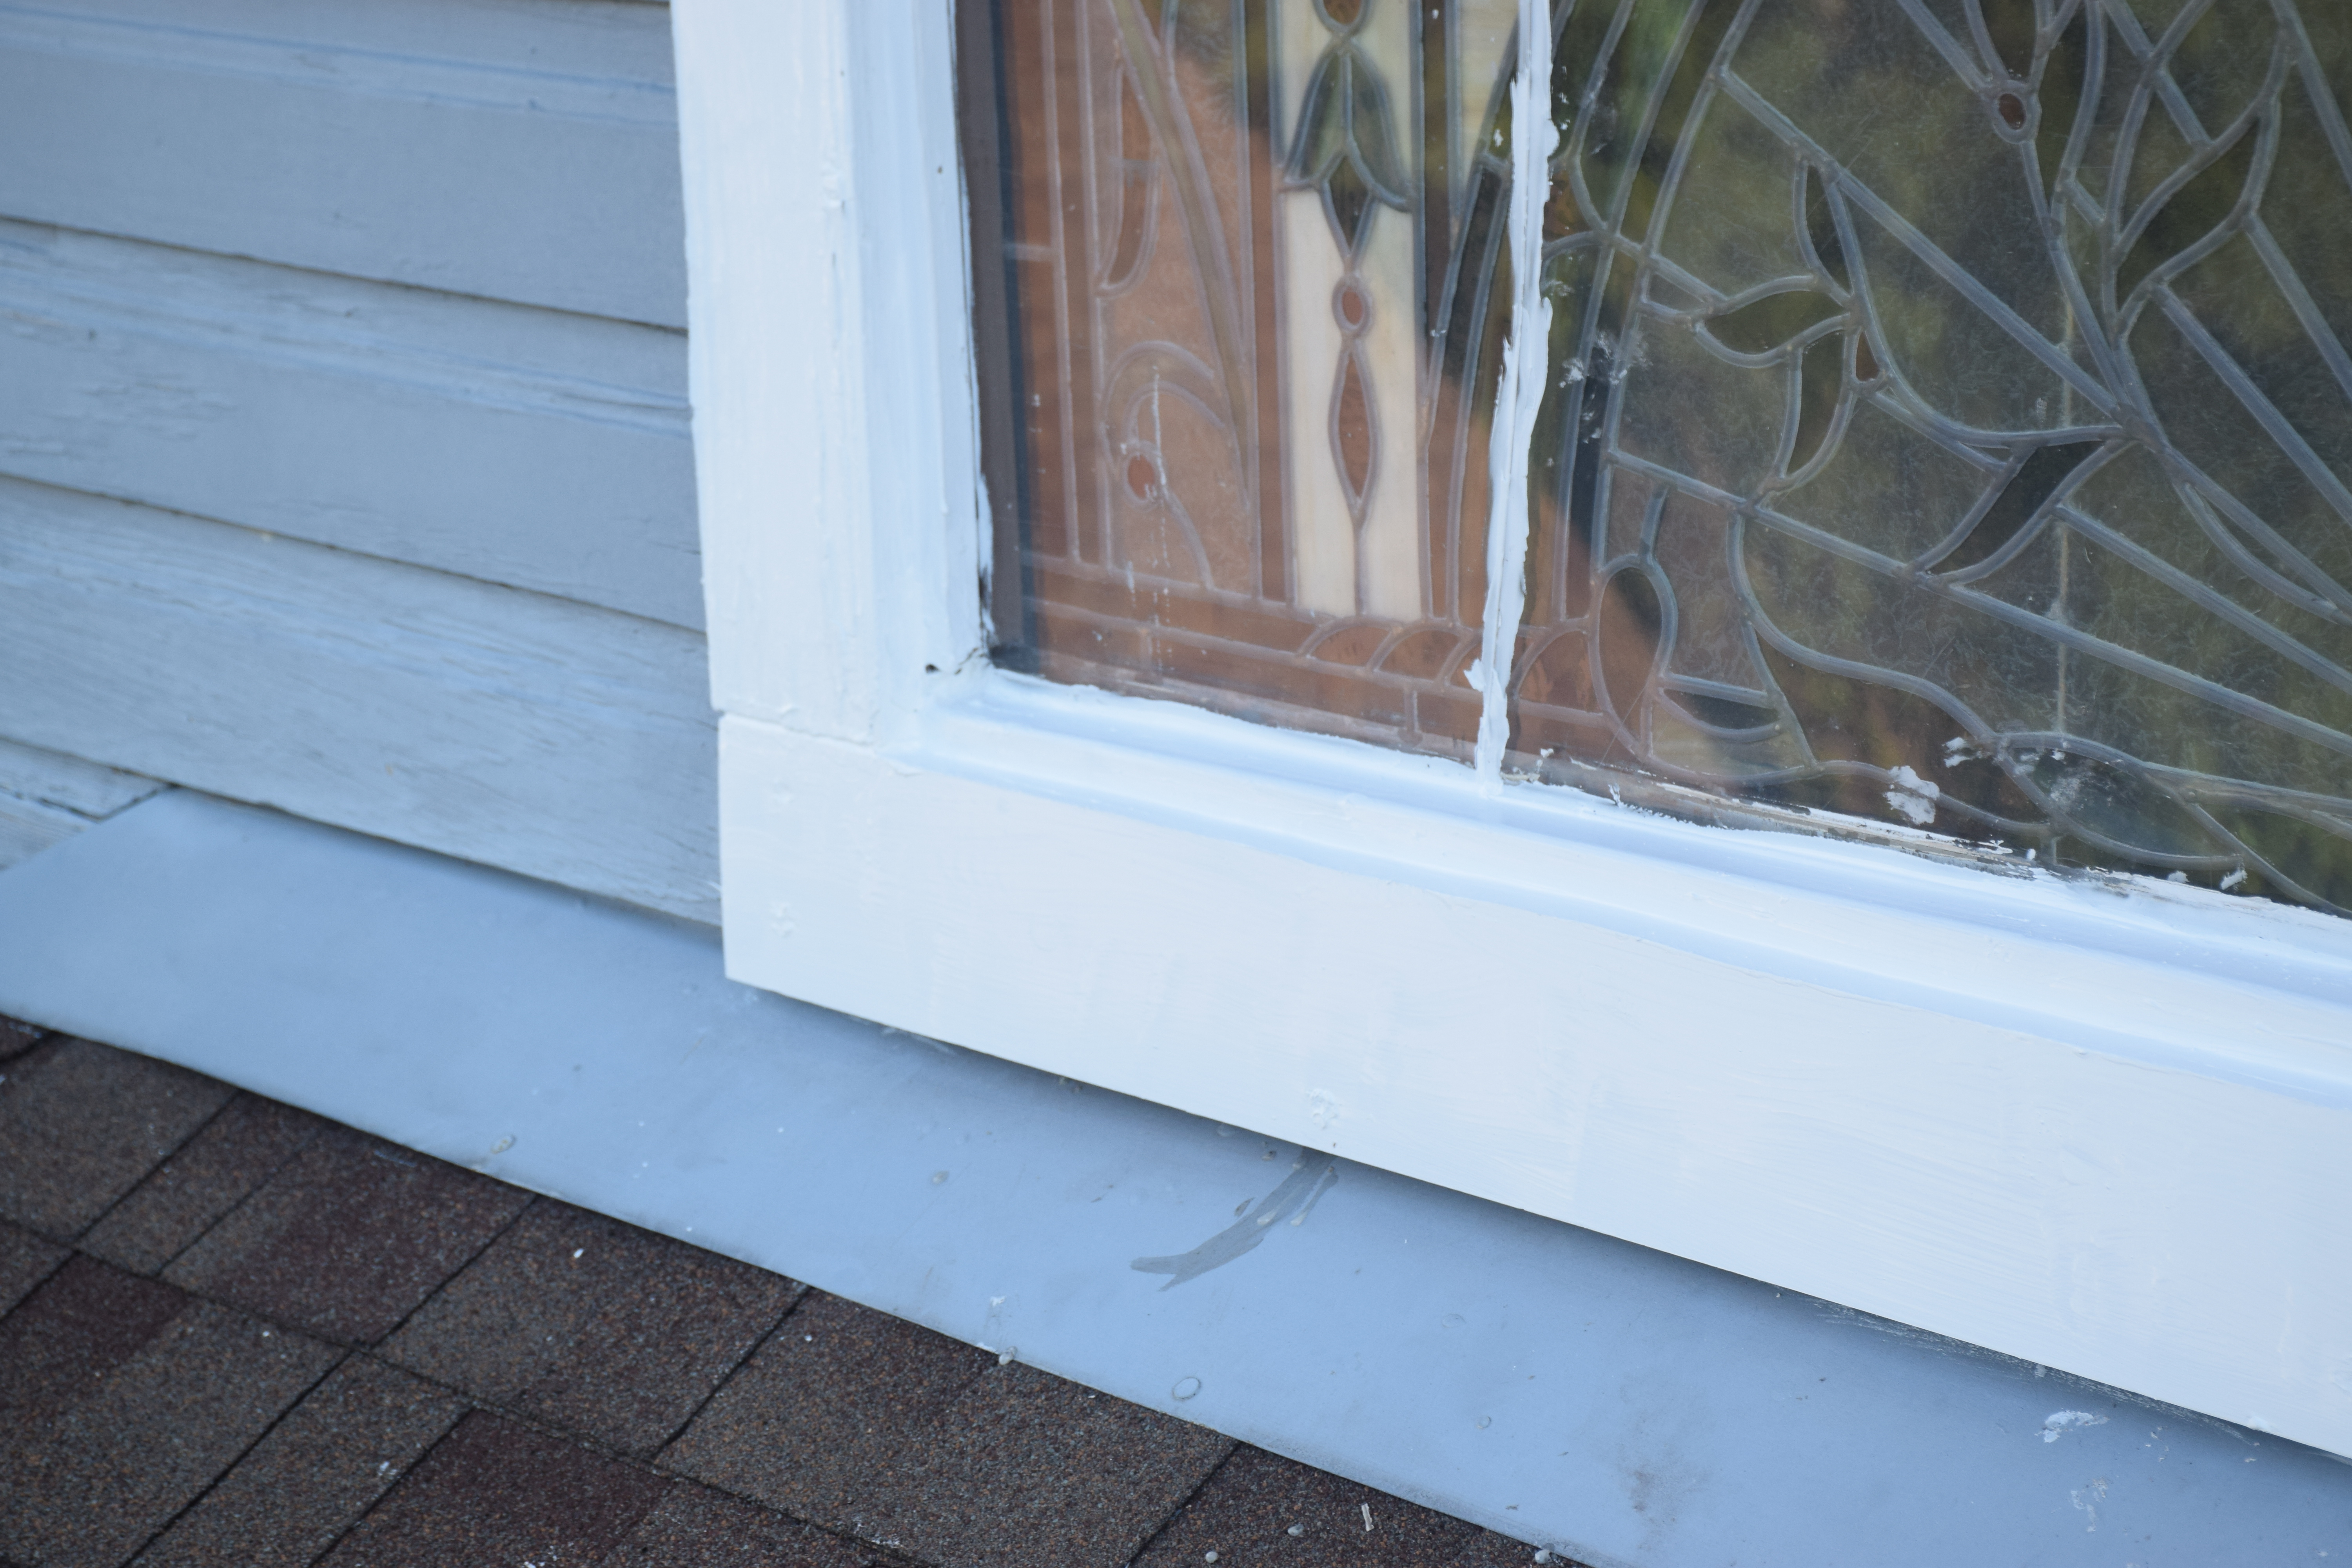 Window After 1 |
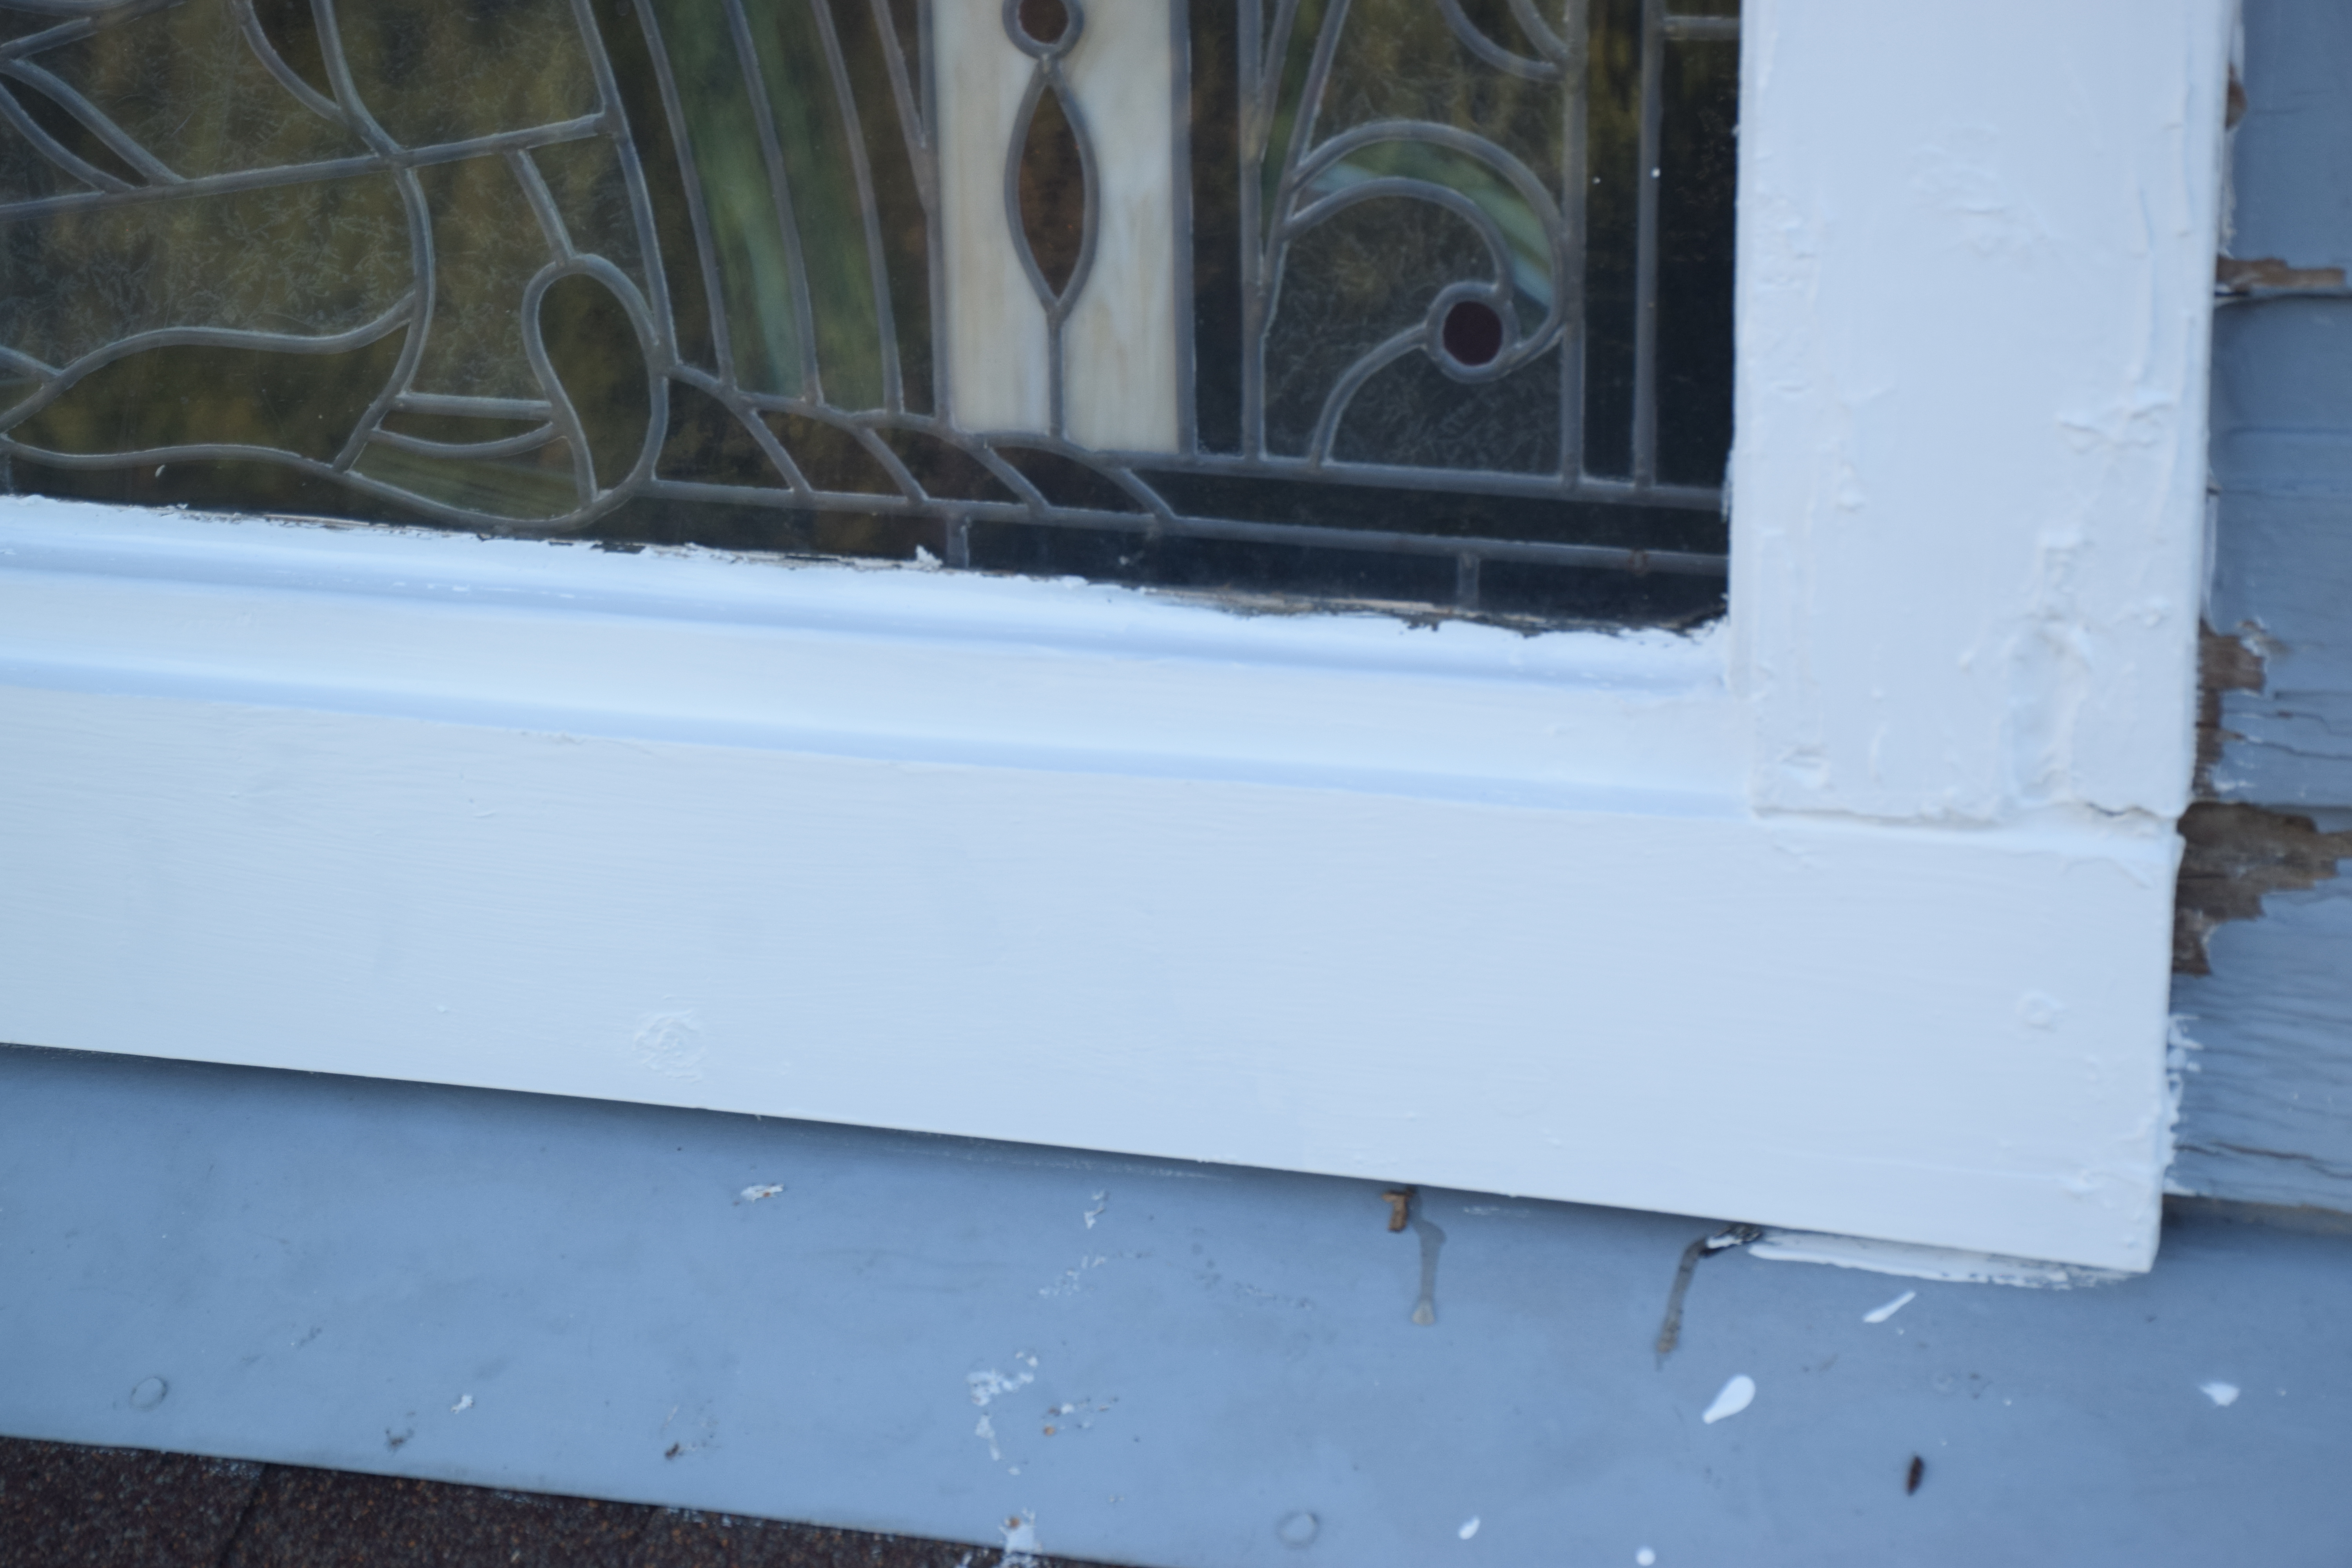 Window After 2 |
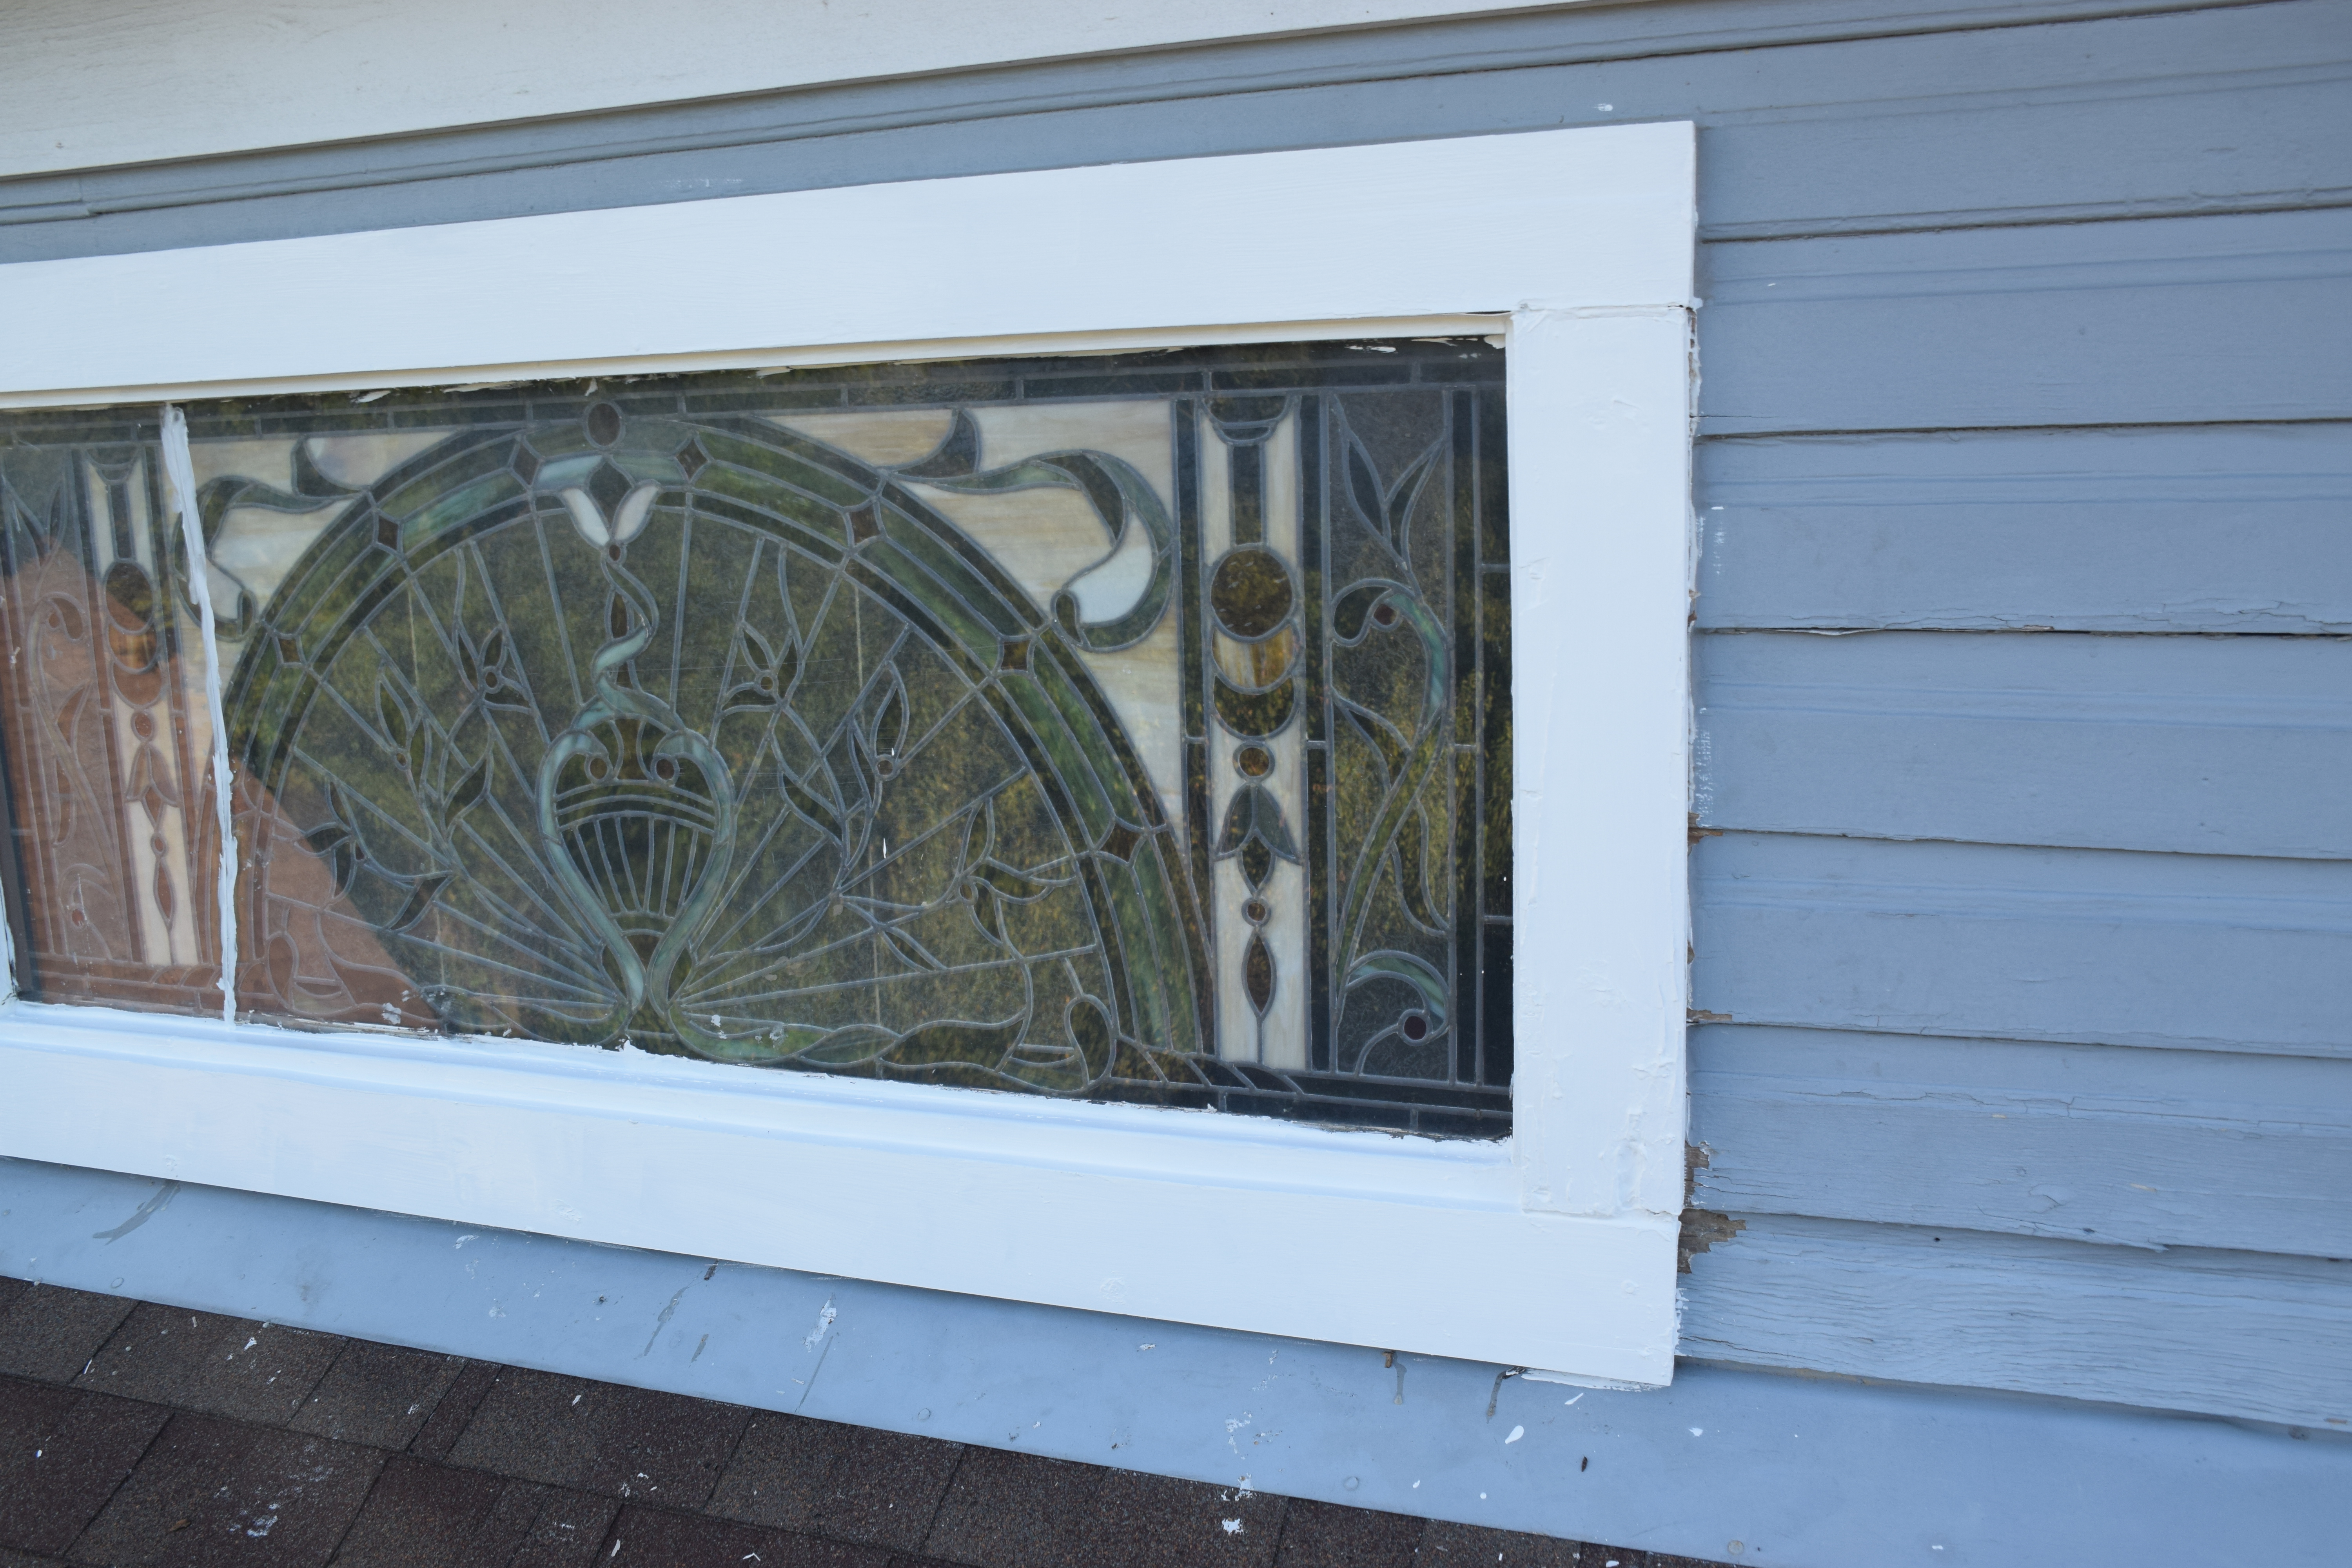 Window After 3 |
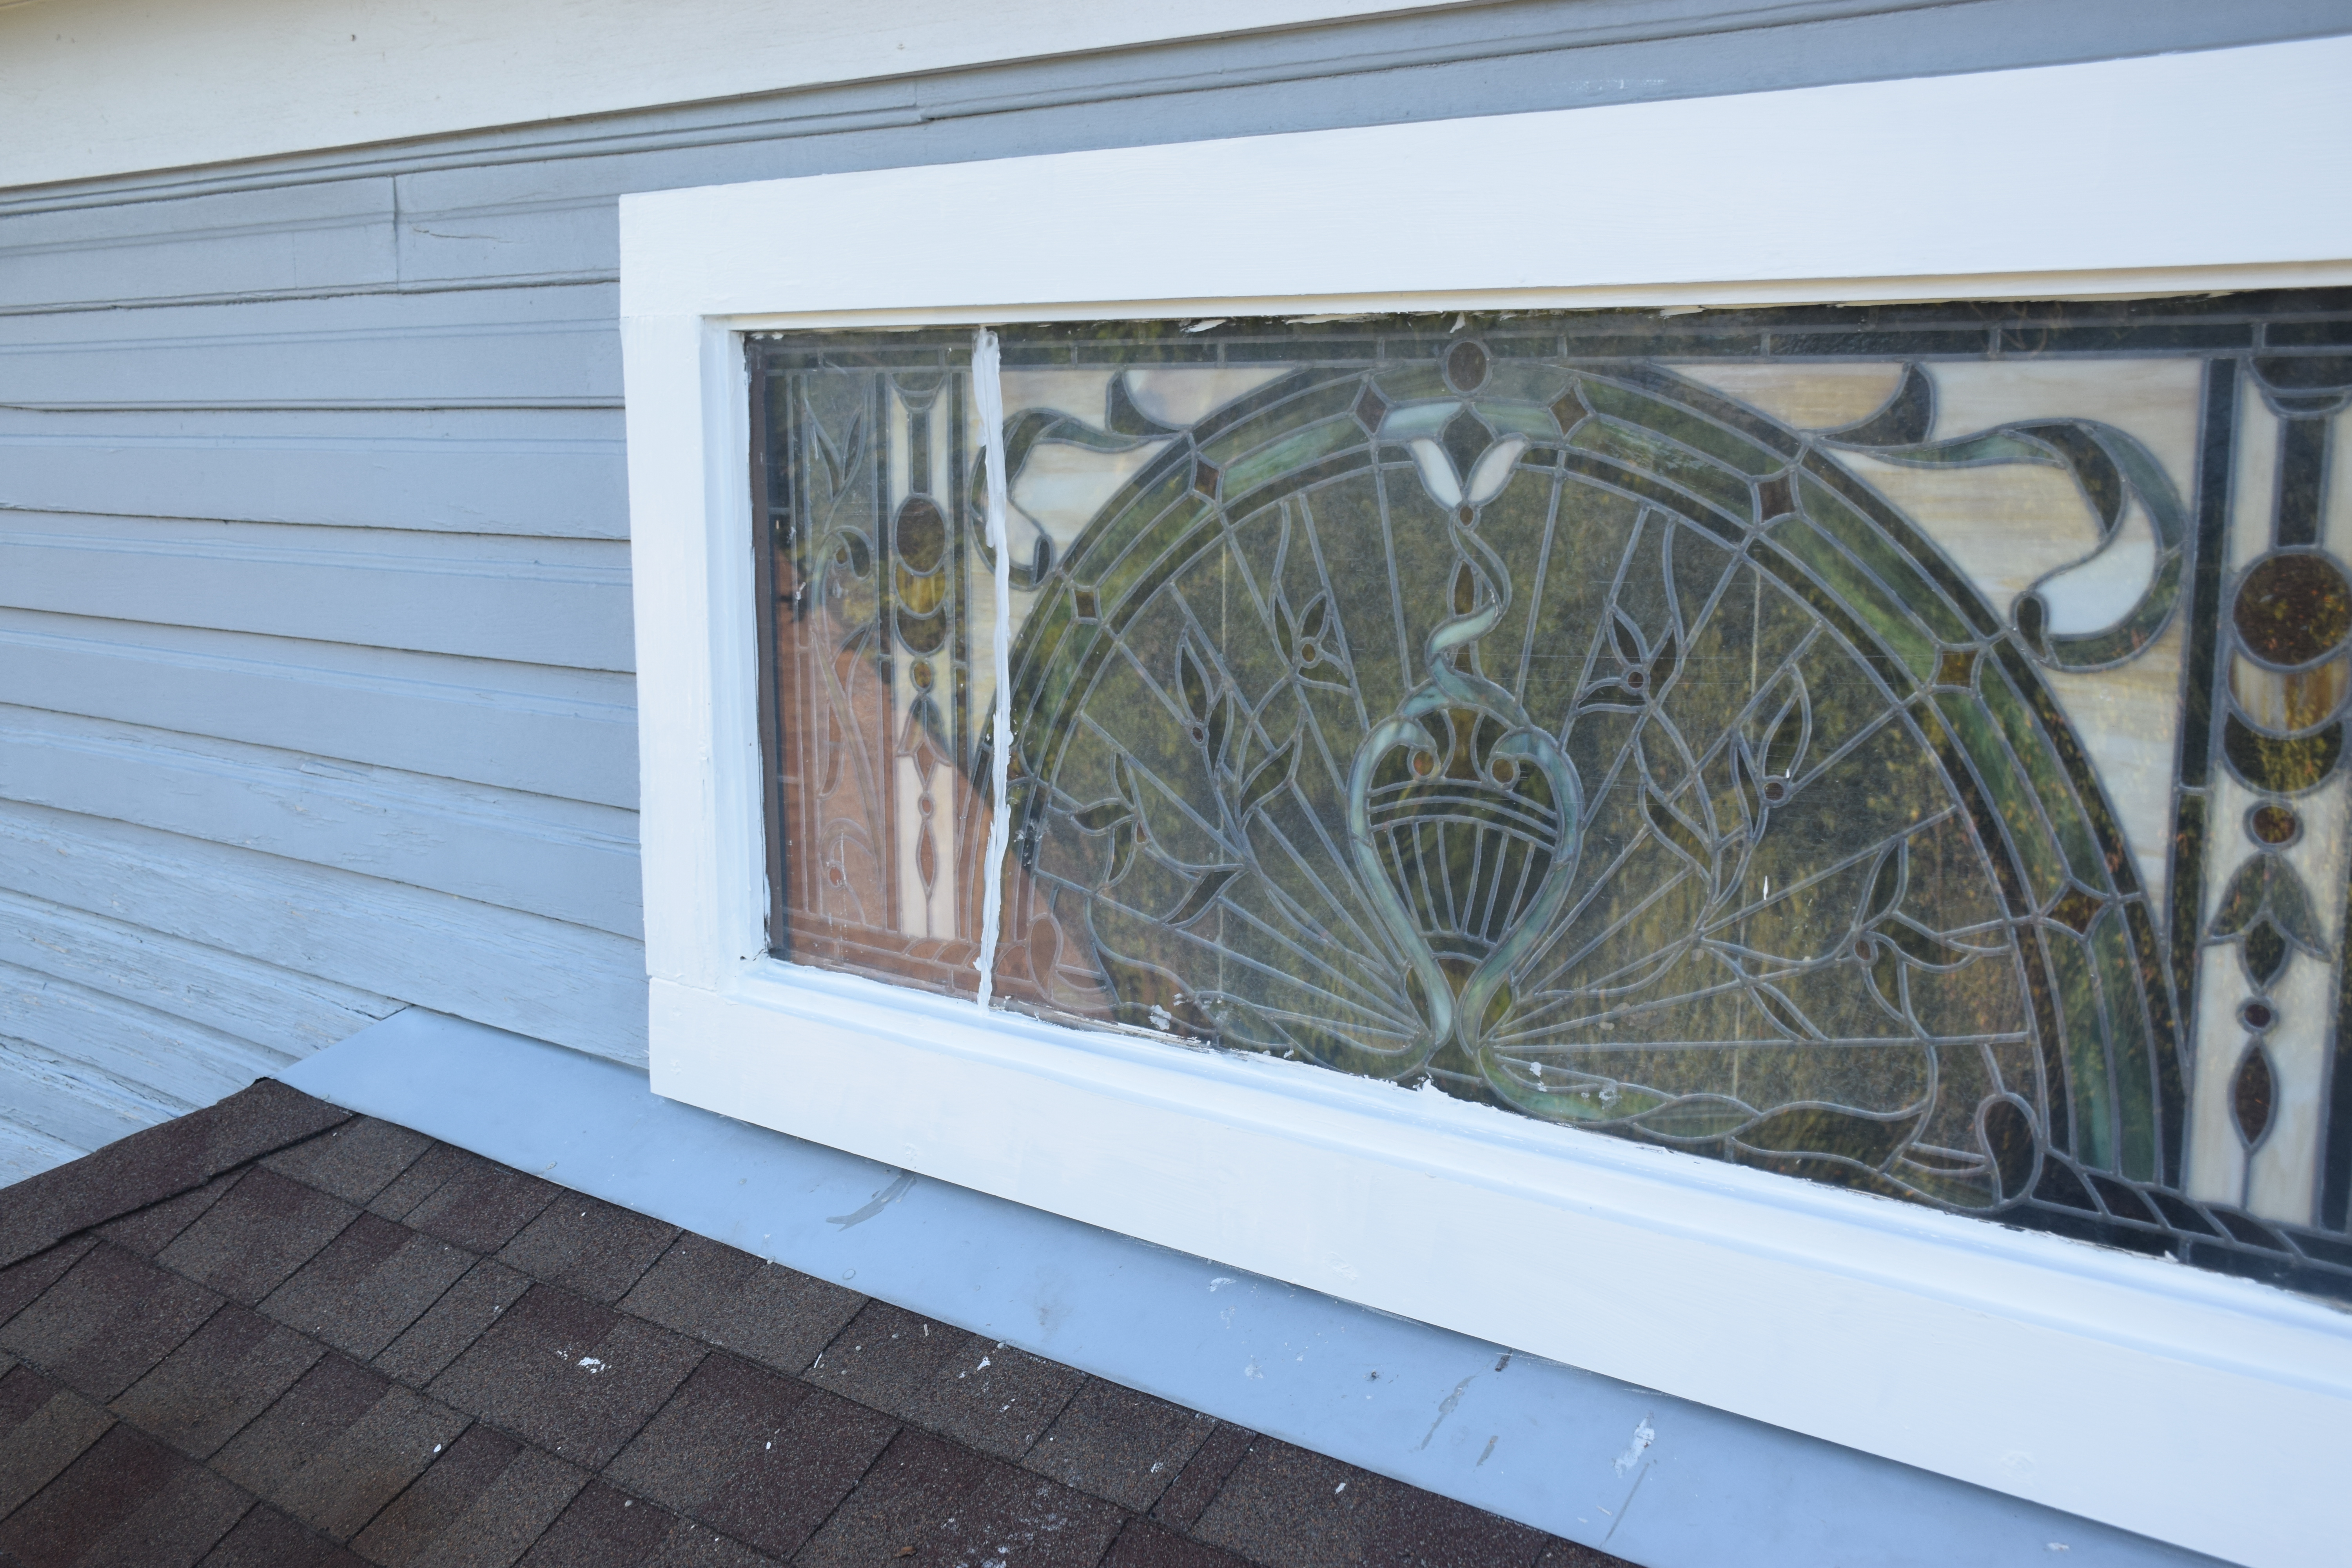 Window After 4 |
I repainted my own Living Room in September 2017. Start to finish was only three days. My father had last painted it in 1992. We put a semi-gloss light blue on the walls and gloss dark blue on the trim. I left the ceiling white.
 Living Room 1 Before |
 Living Room 1 After |
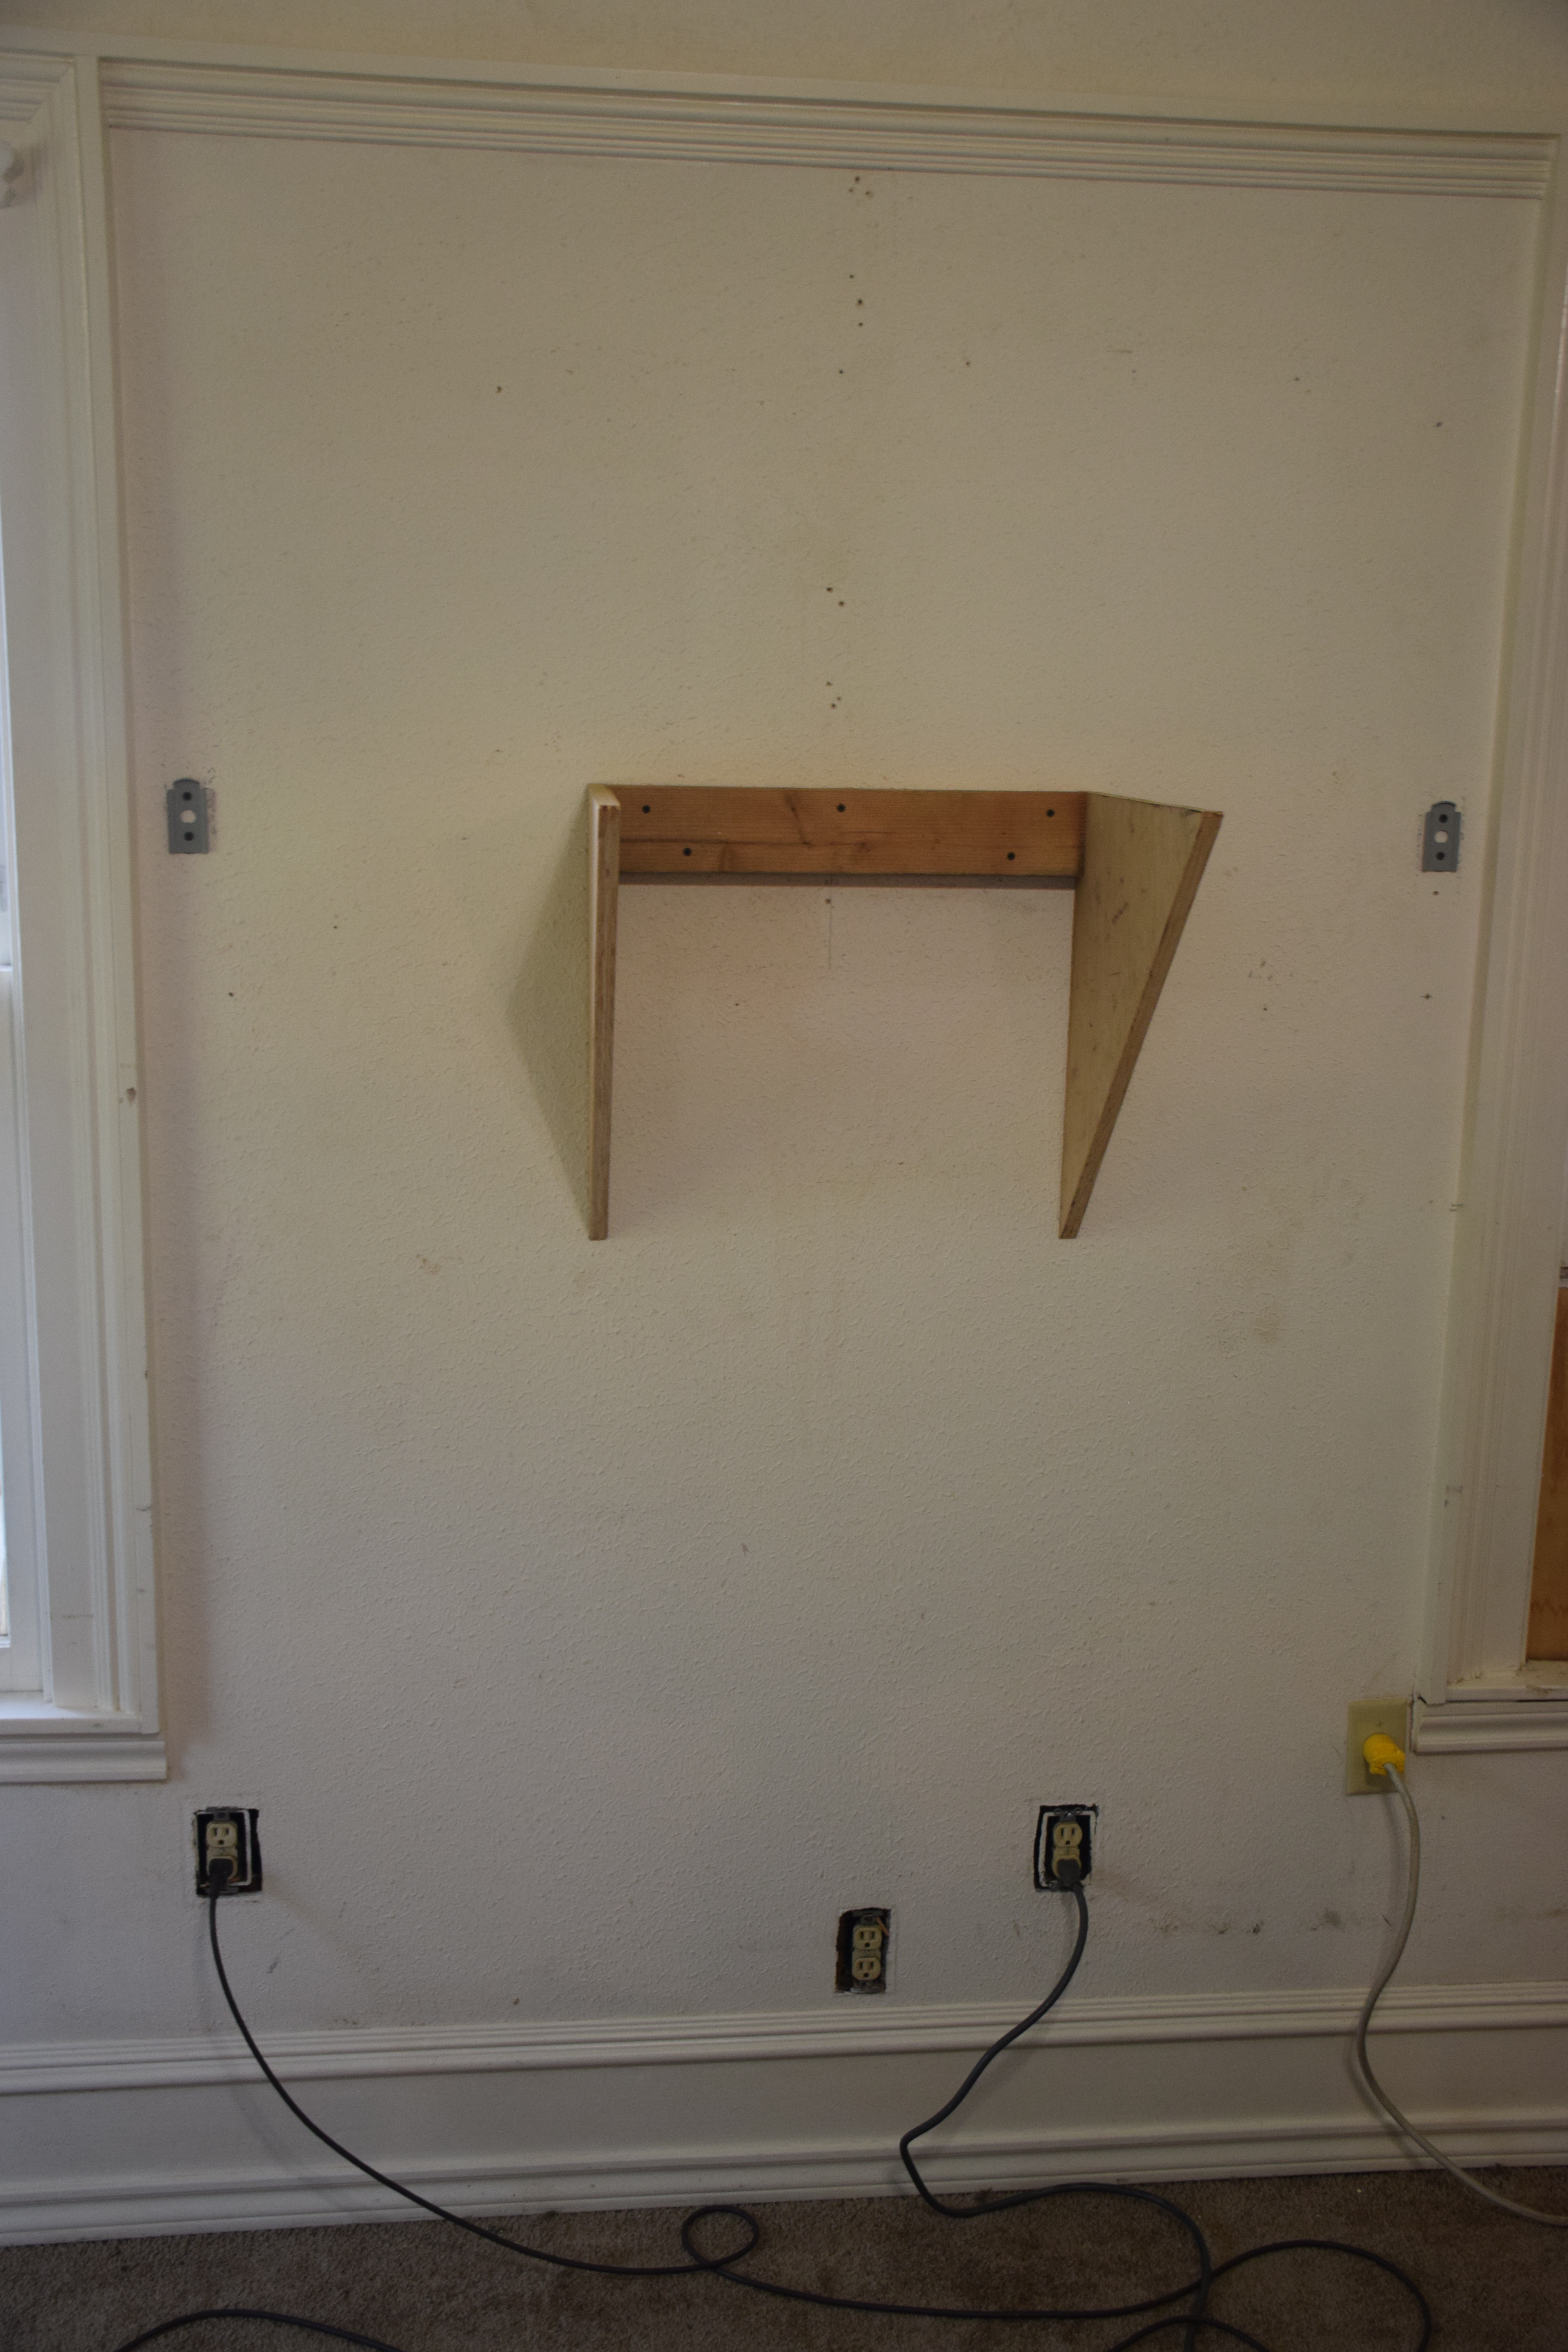 Living Room 2 Before TV Stand |
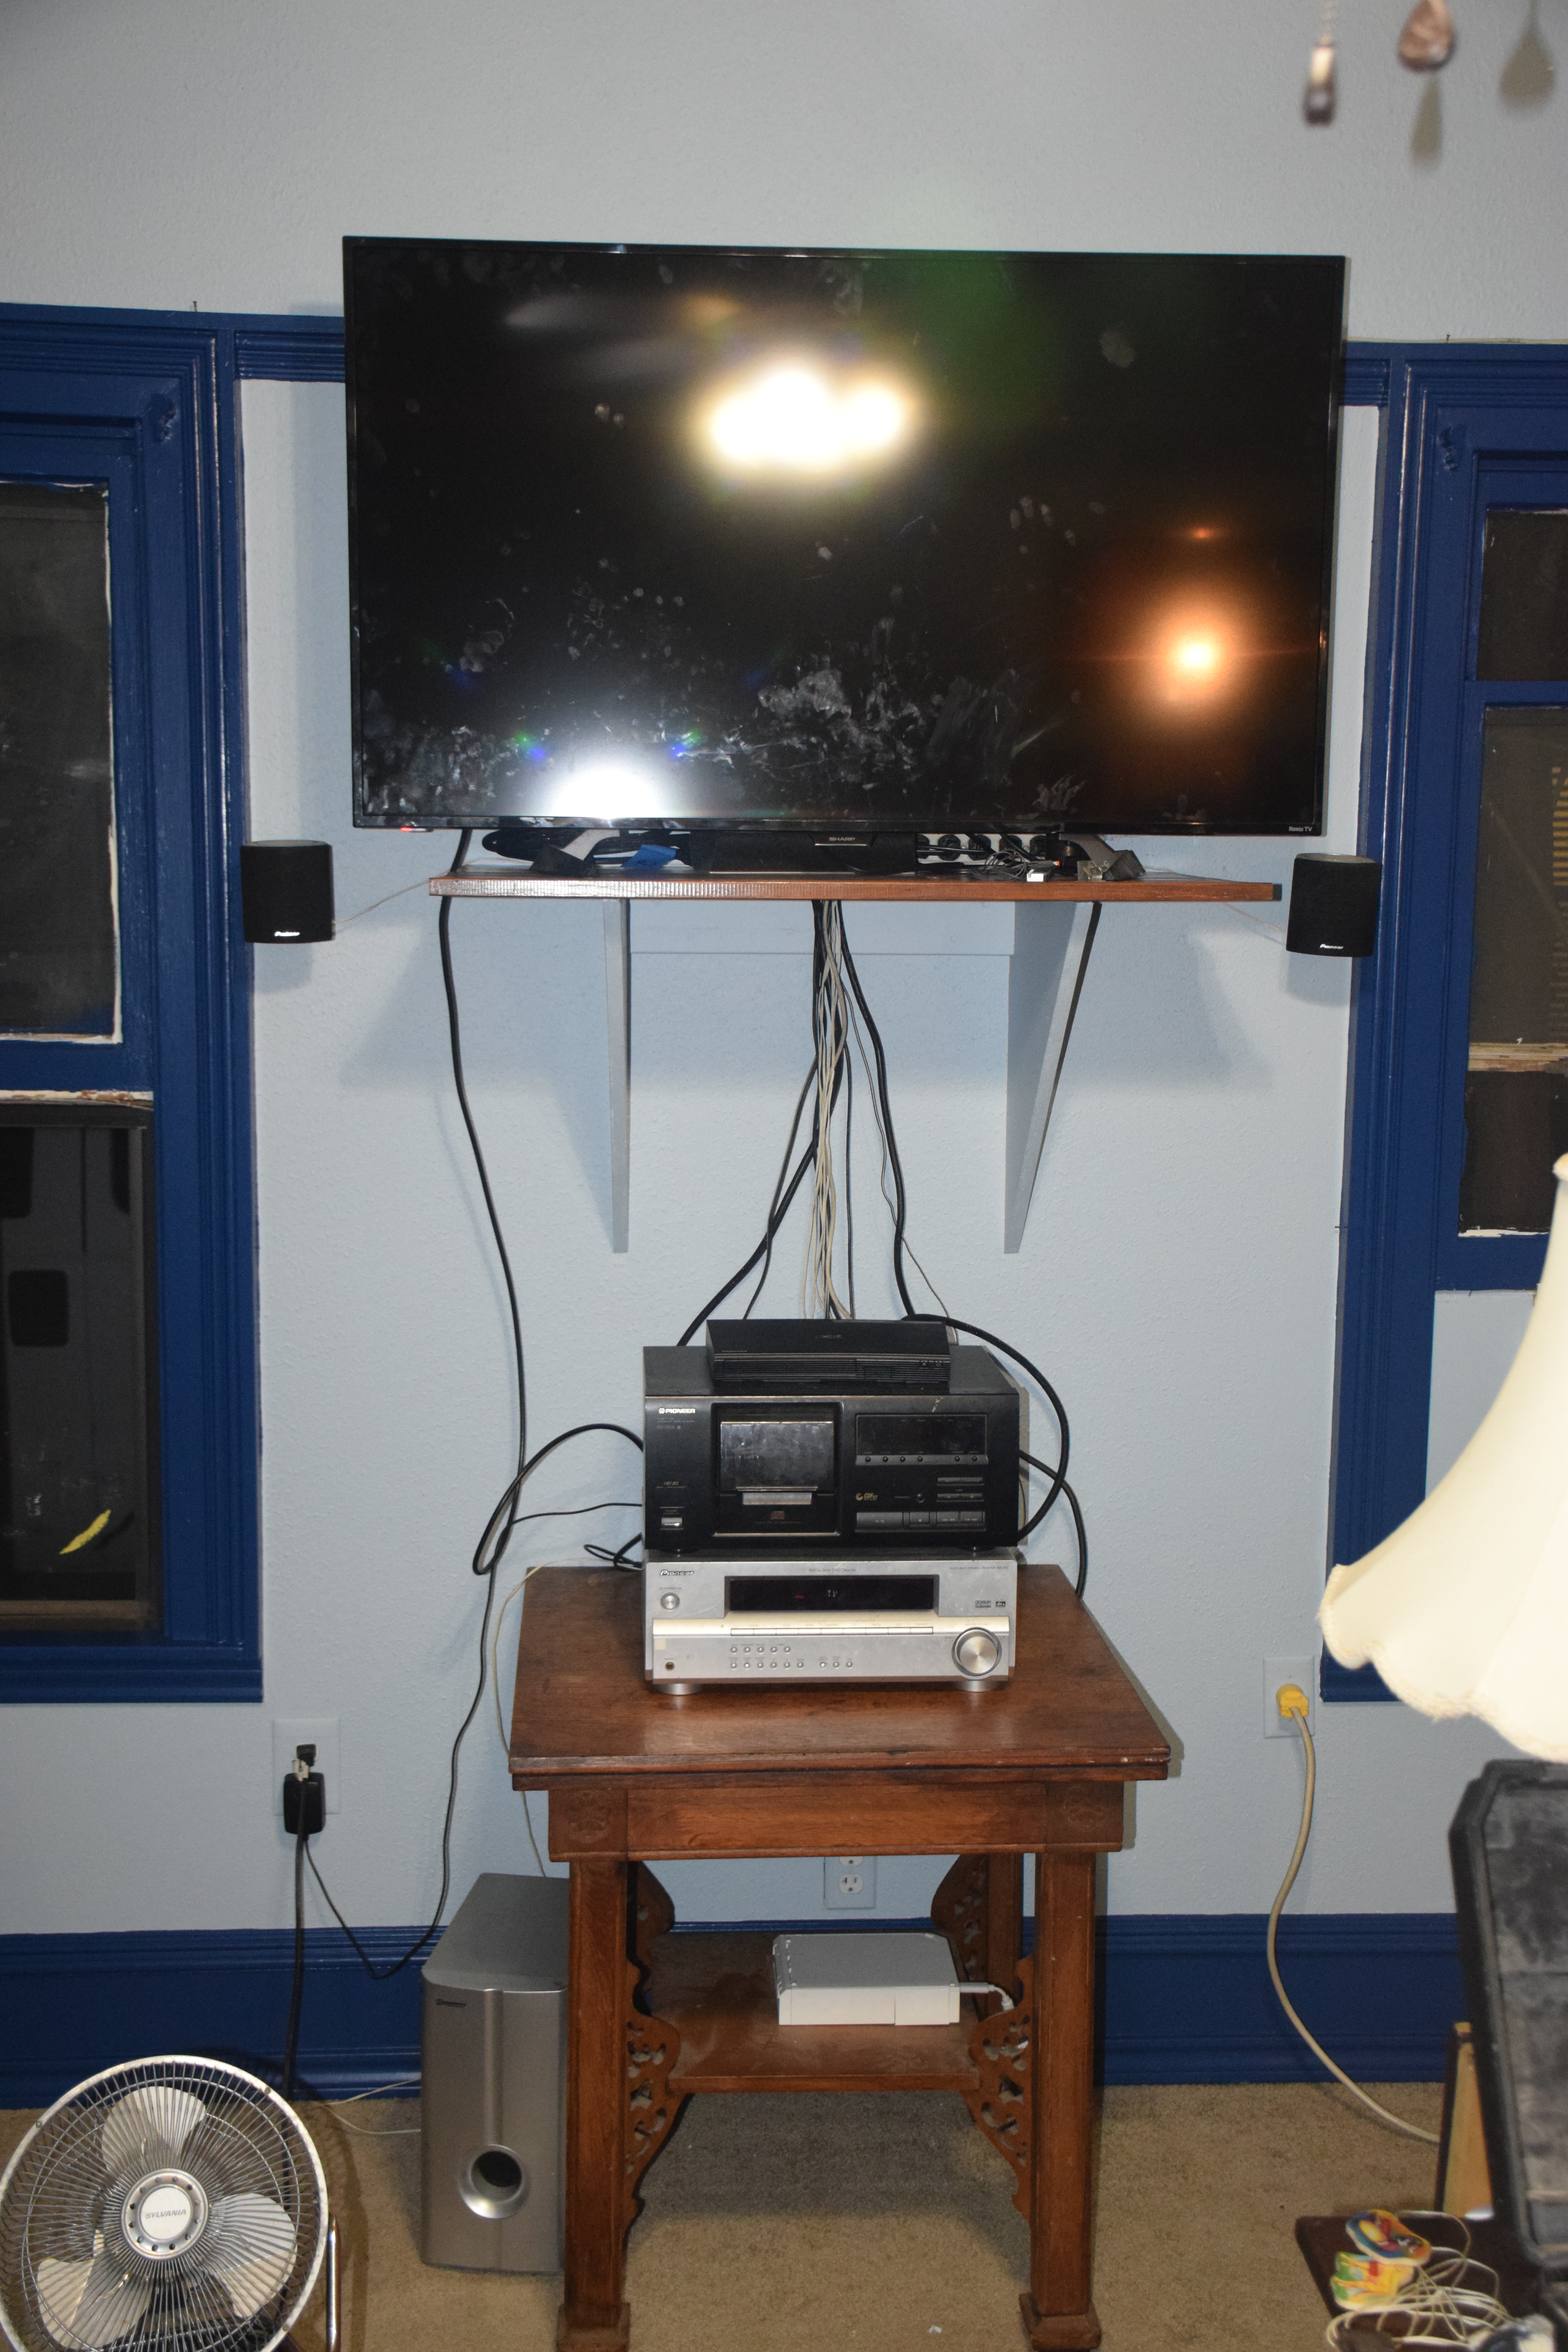 Living Room 2 After TV Stand |
 Living Room 3 AC / Heater Corner |
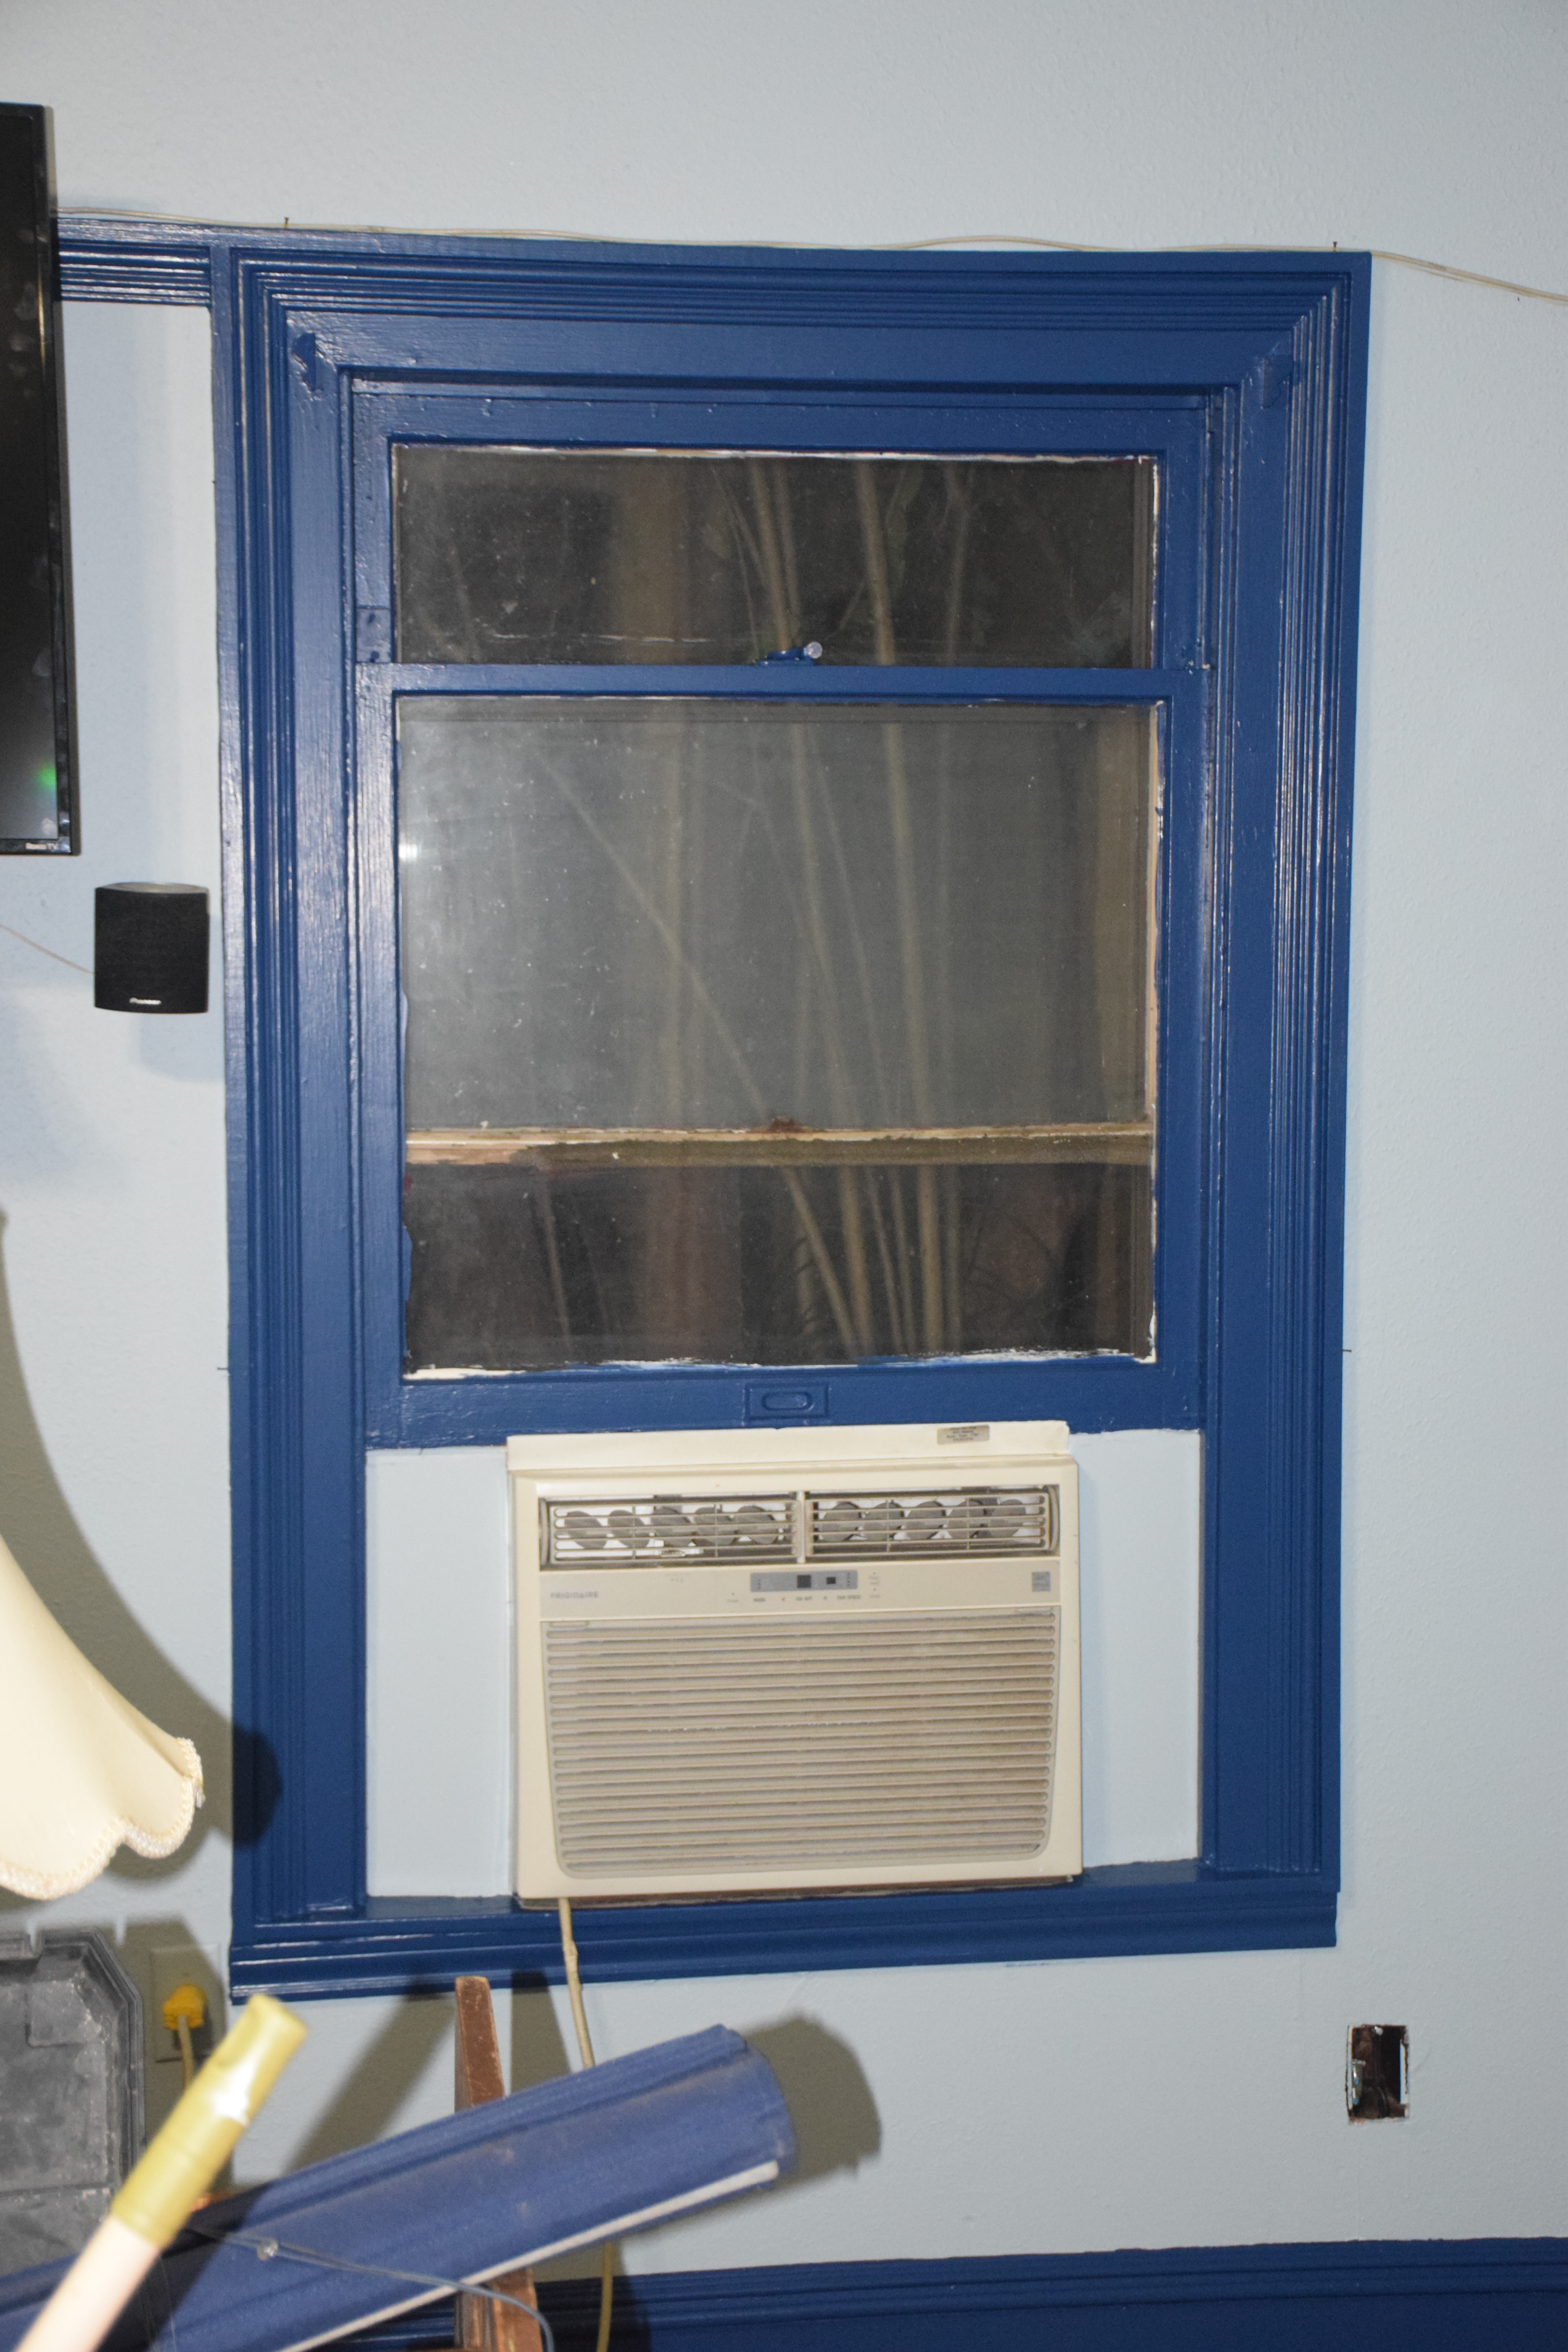 Living Room 3 AC |
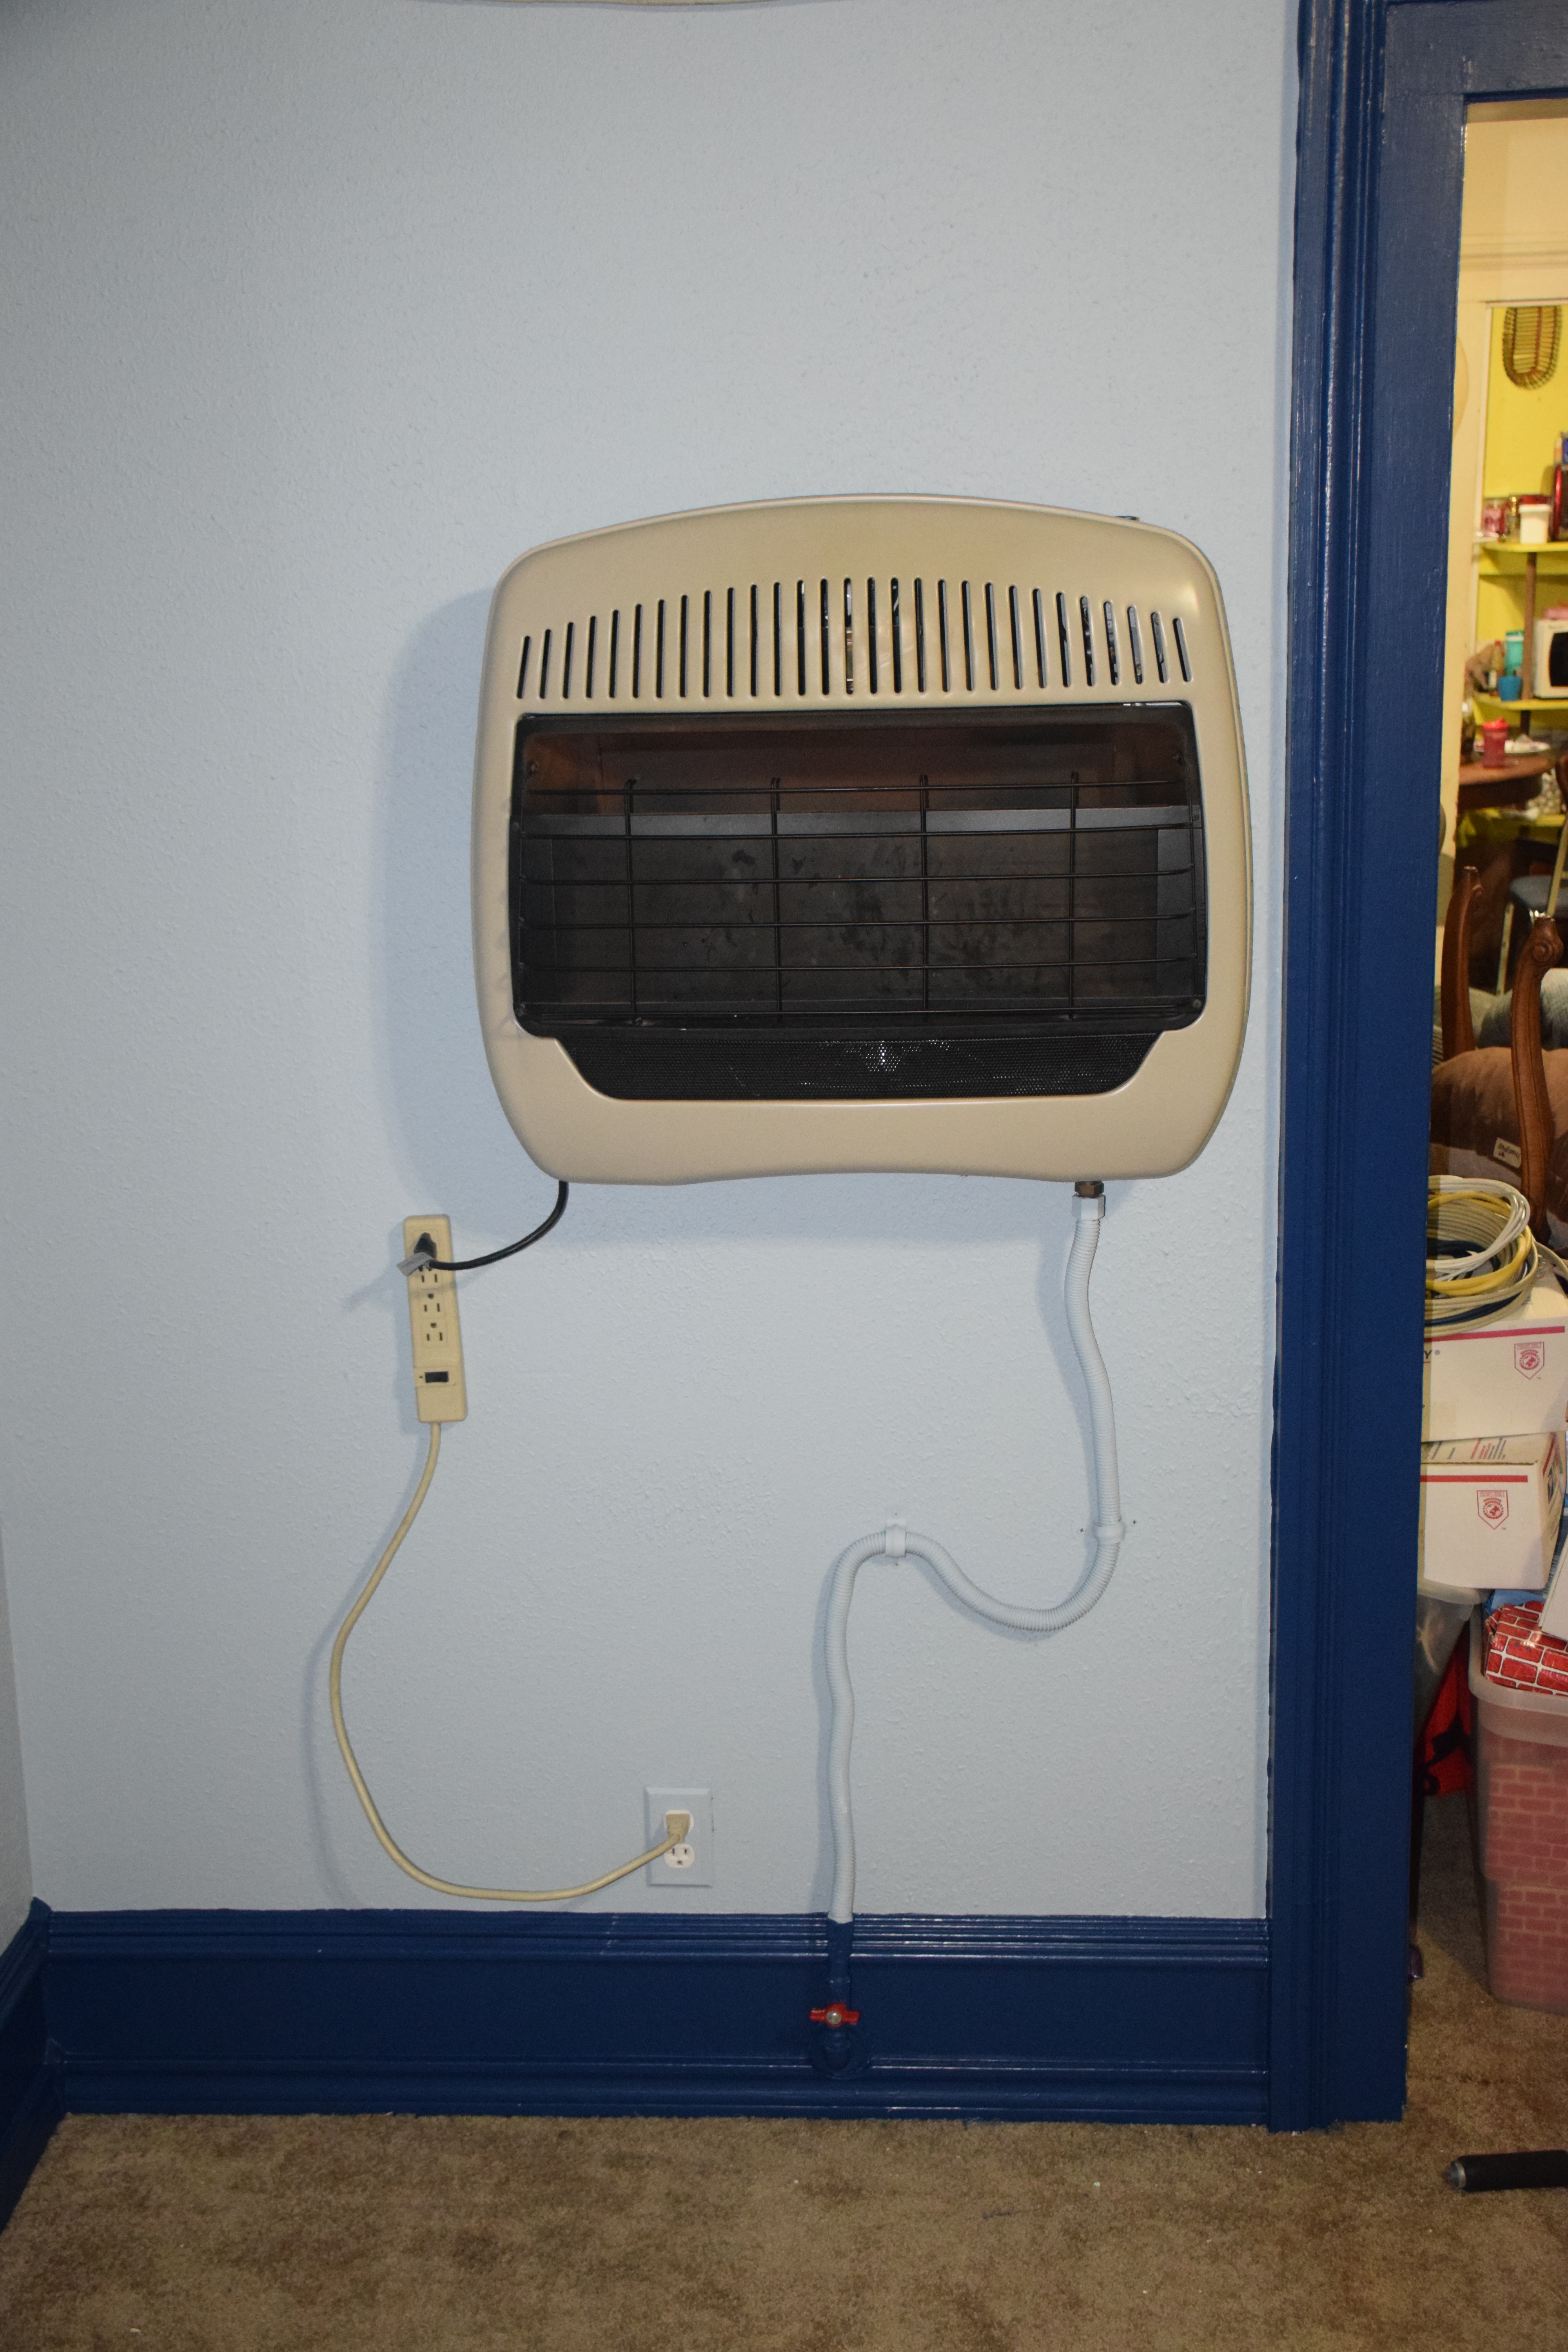 Living Room 3 Heater, I even painted the gas supply hose. |
One of the odder problems we have is towel rods and towel rings, if there is not a stud in the wall where you want the rod or ring; you have to mount it to the sheetrock. This is not especially durable or permanent. My solution in my own Master Bath was to install a piece of 1x4 from stud to stud and install the ring and rod back where they are secure. The pieces are cut to fit, painted to match, and I painted the tops of the screws after. In retrospect, I should have cut out the sheetrock and installed half-inch plywood from stud to stud, then textured and painted to match, then it would not be obvious what I had done.
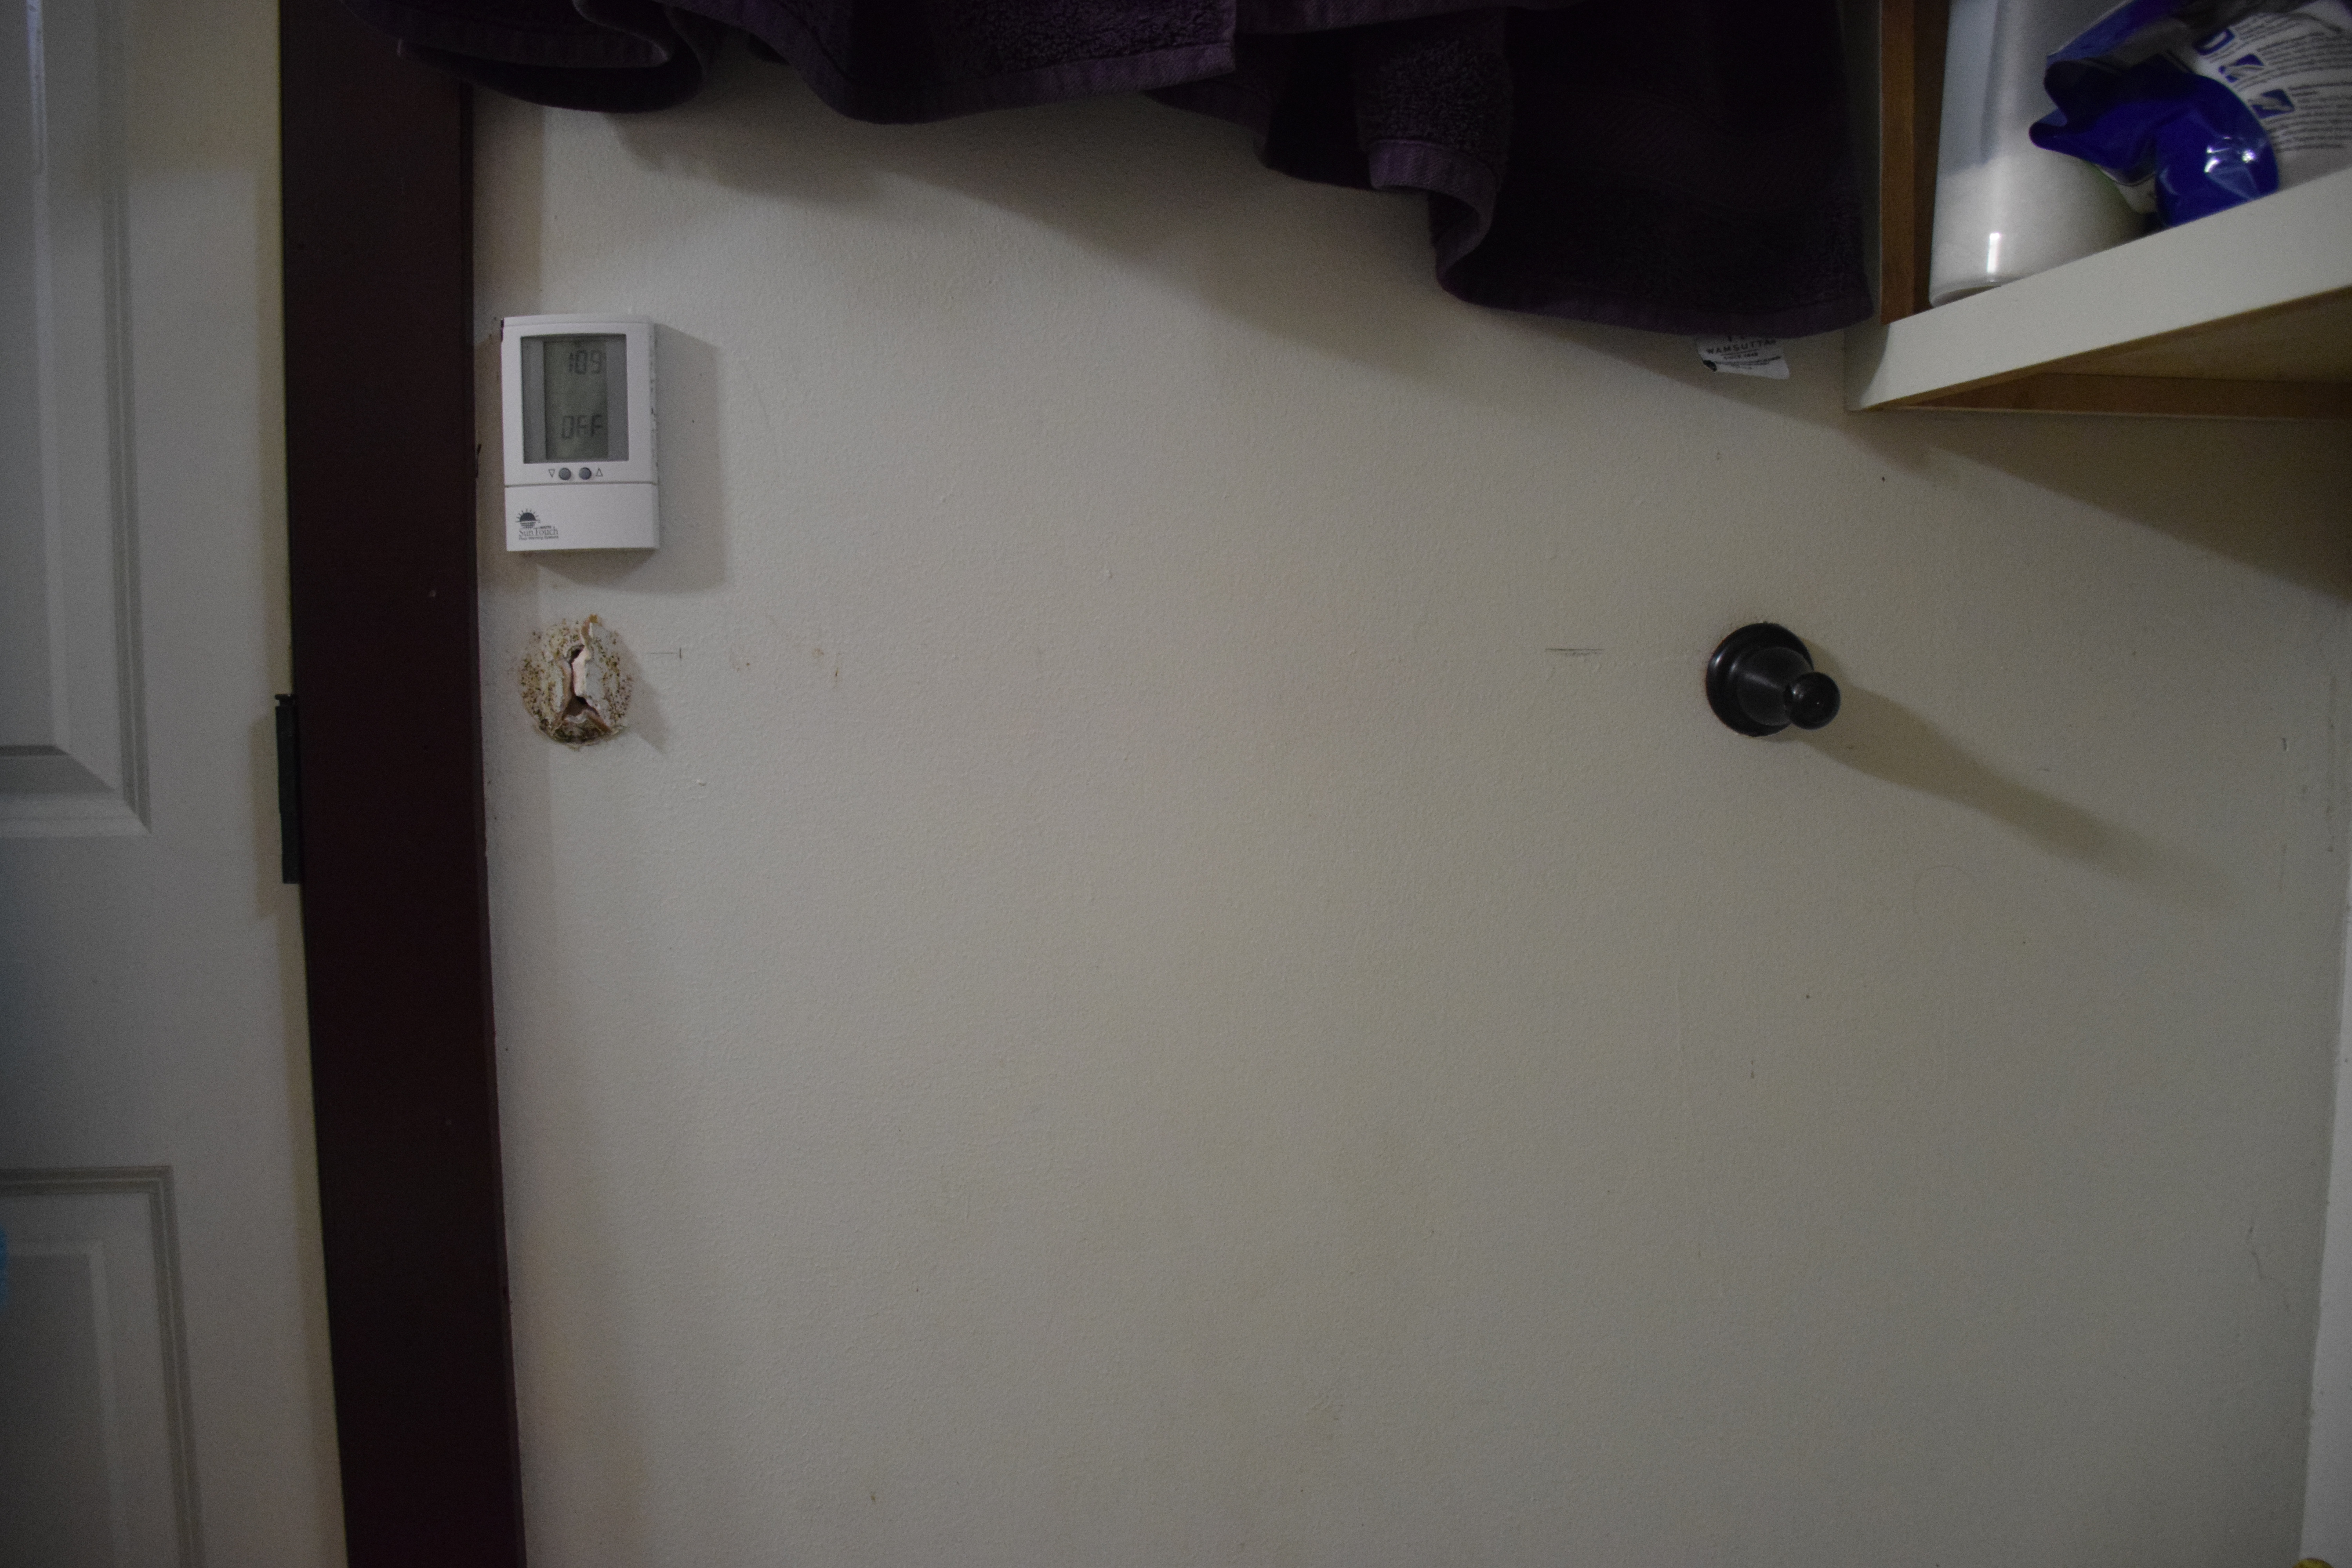 Before: original anchor ripped out. |
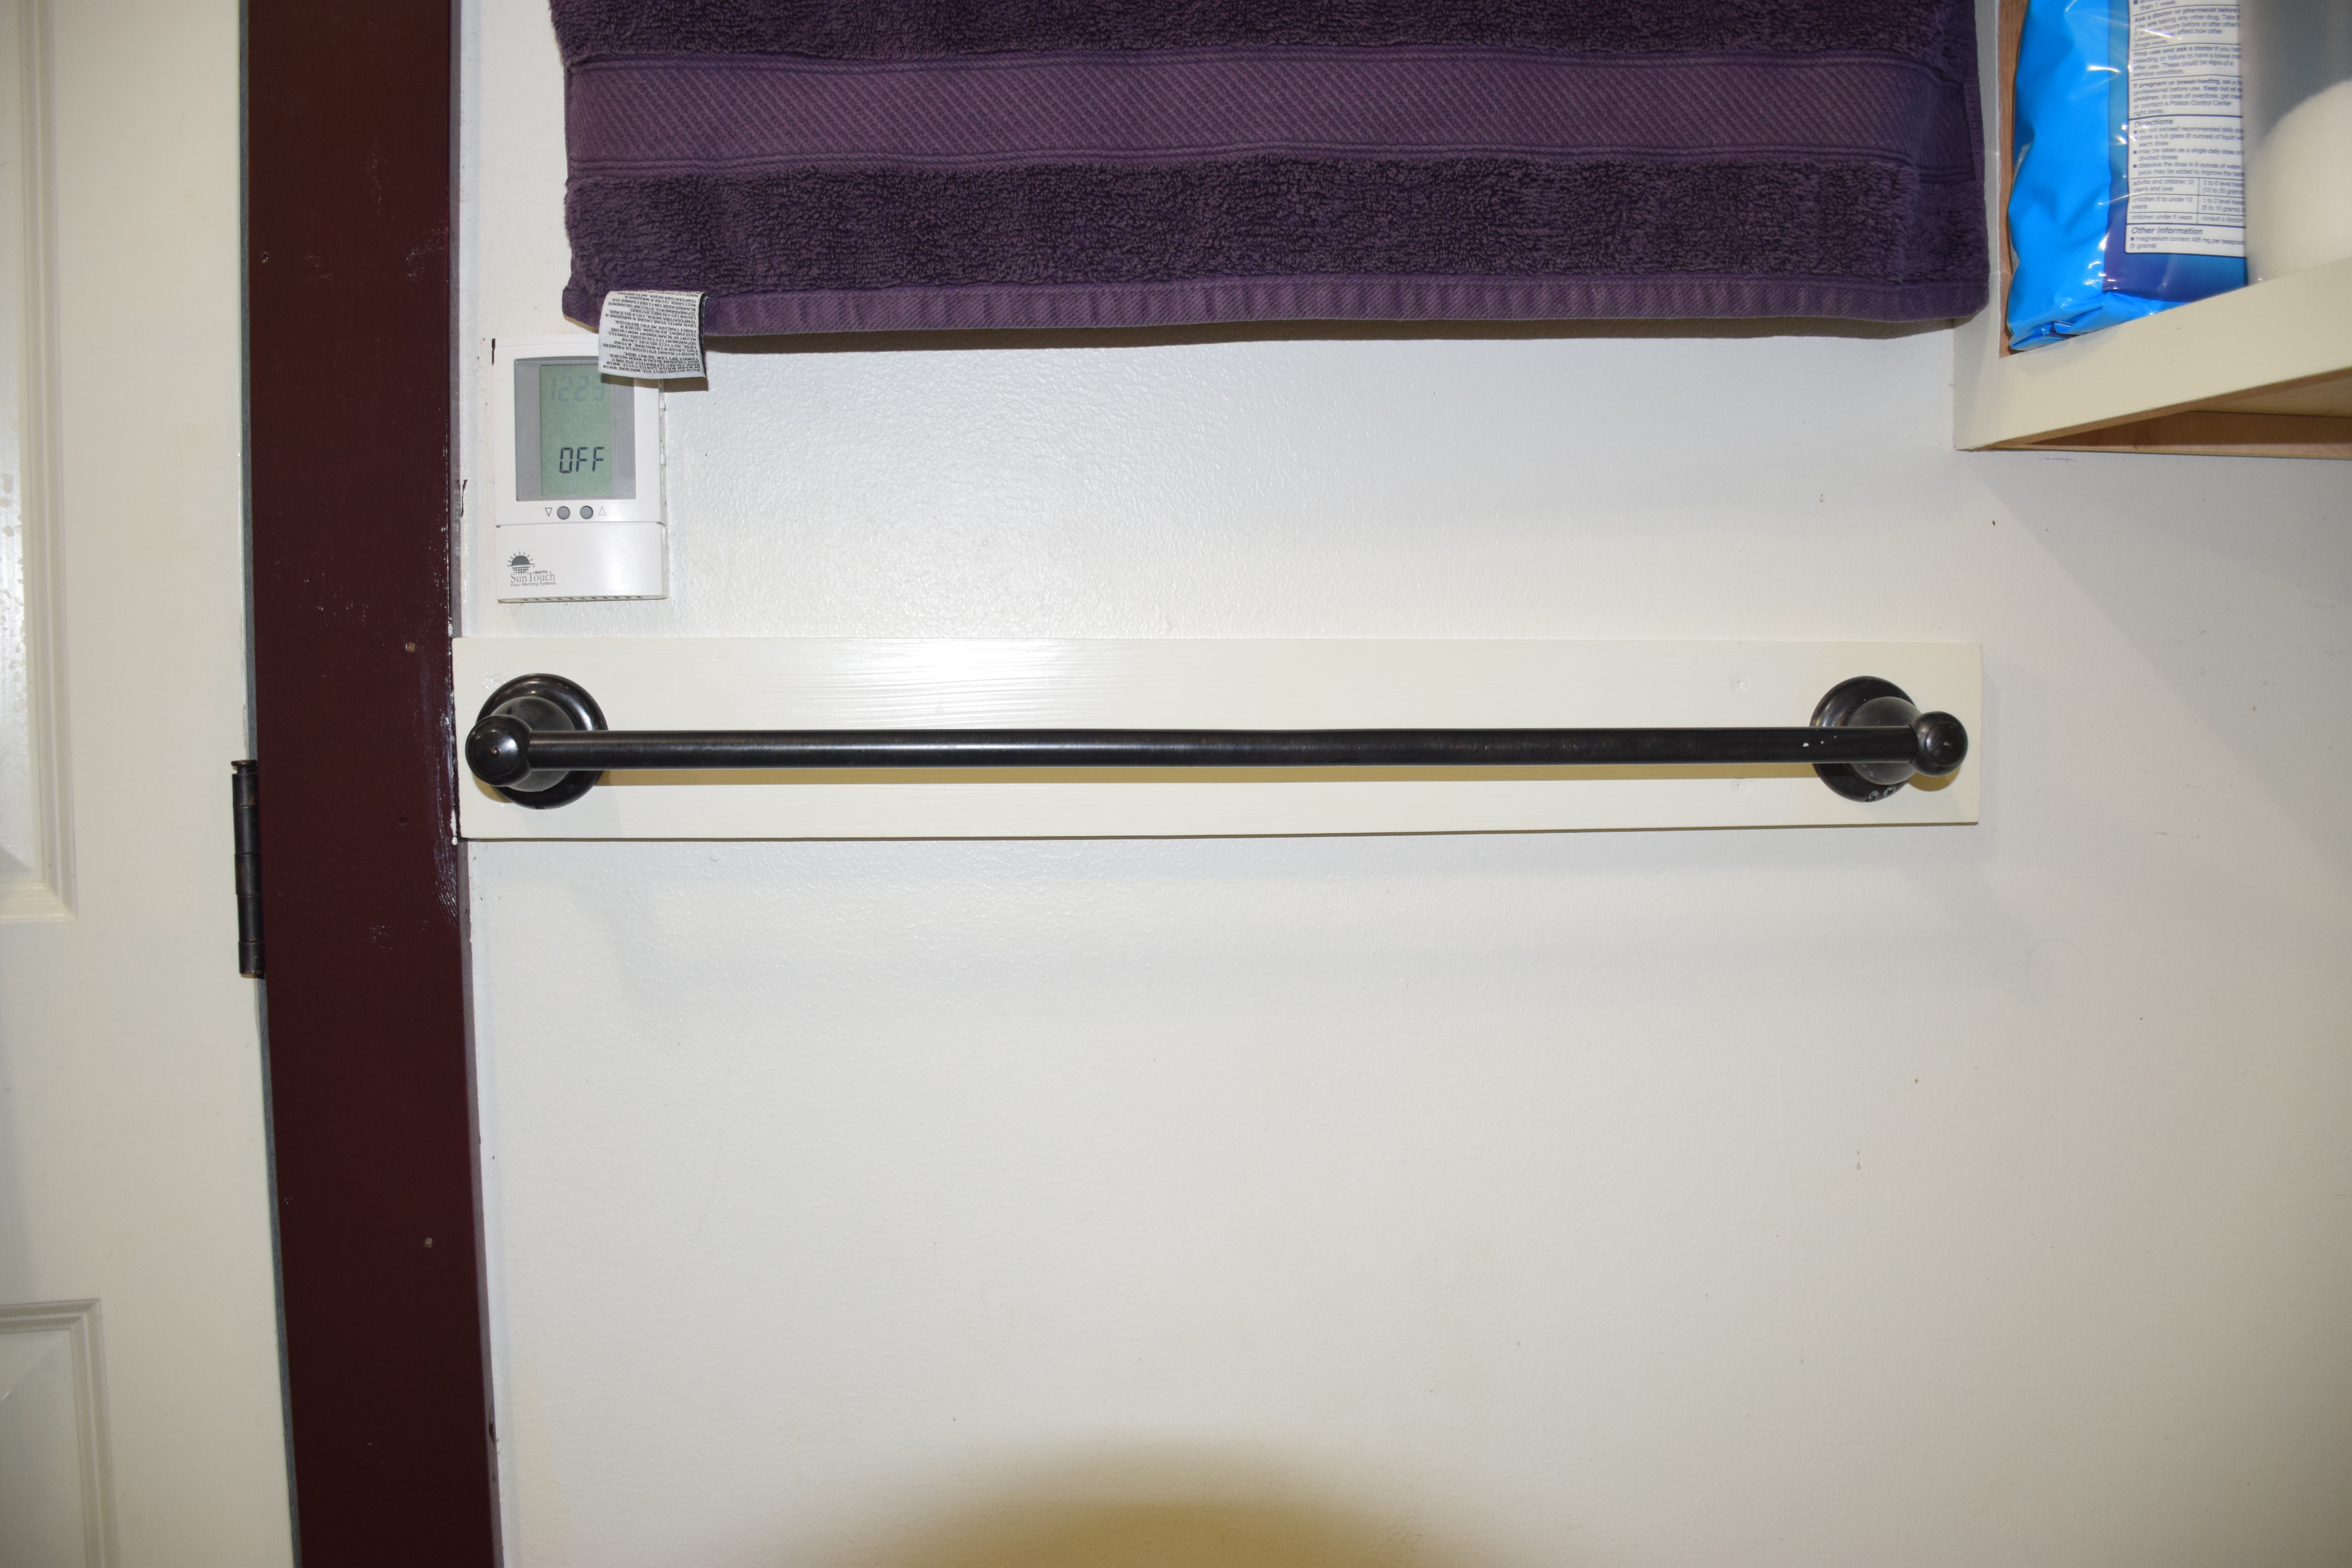 Installed Towel Rod without Towel |
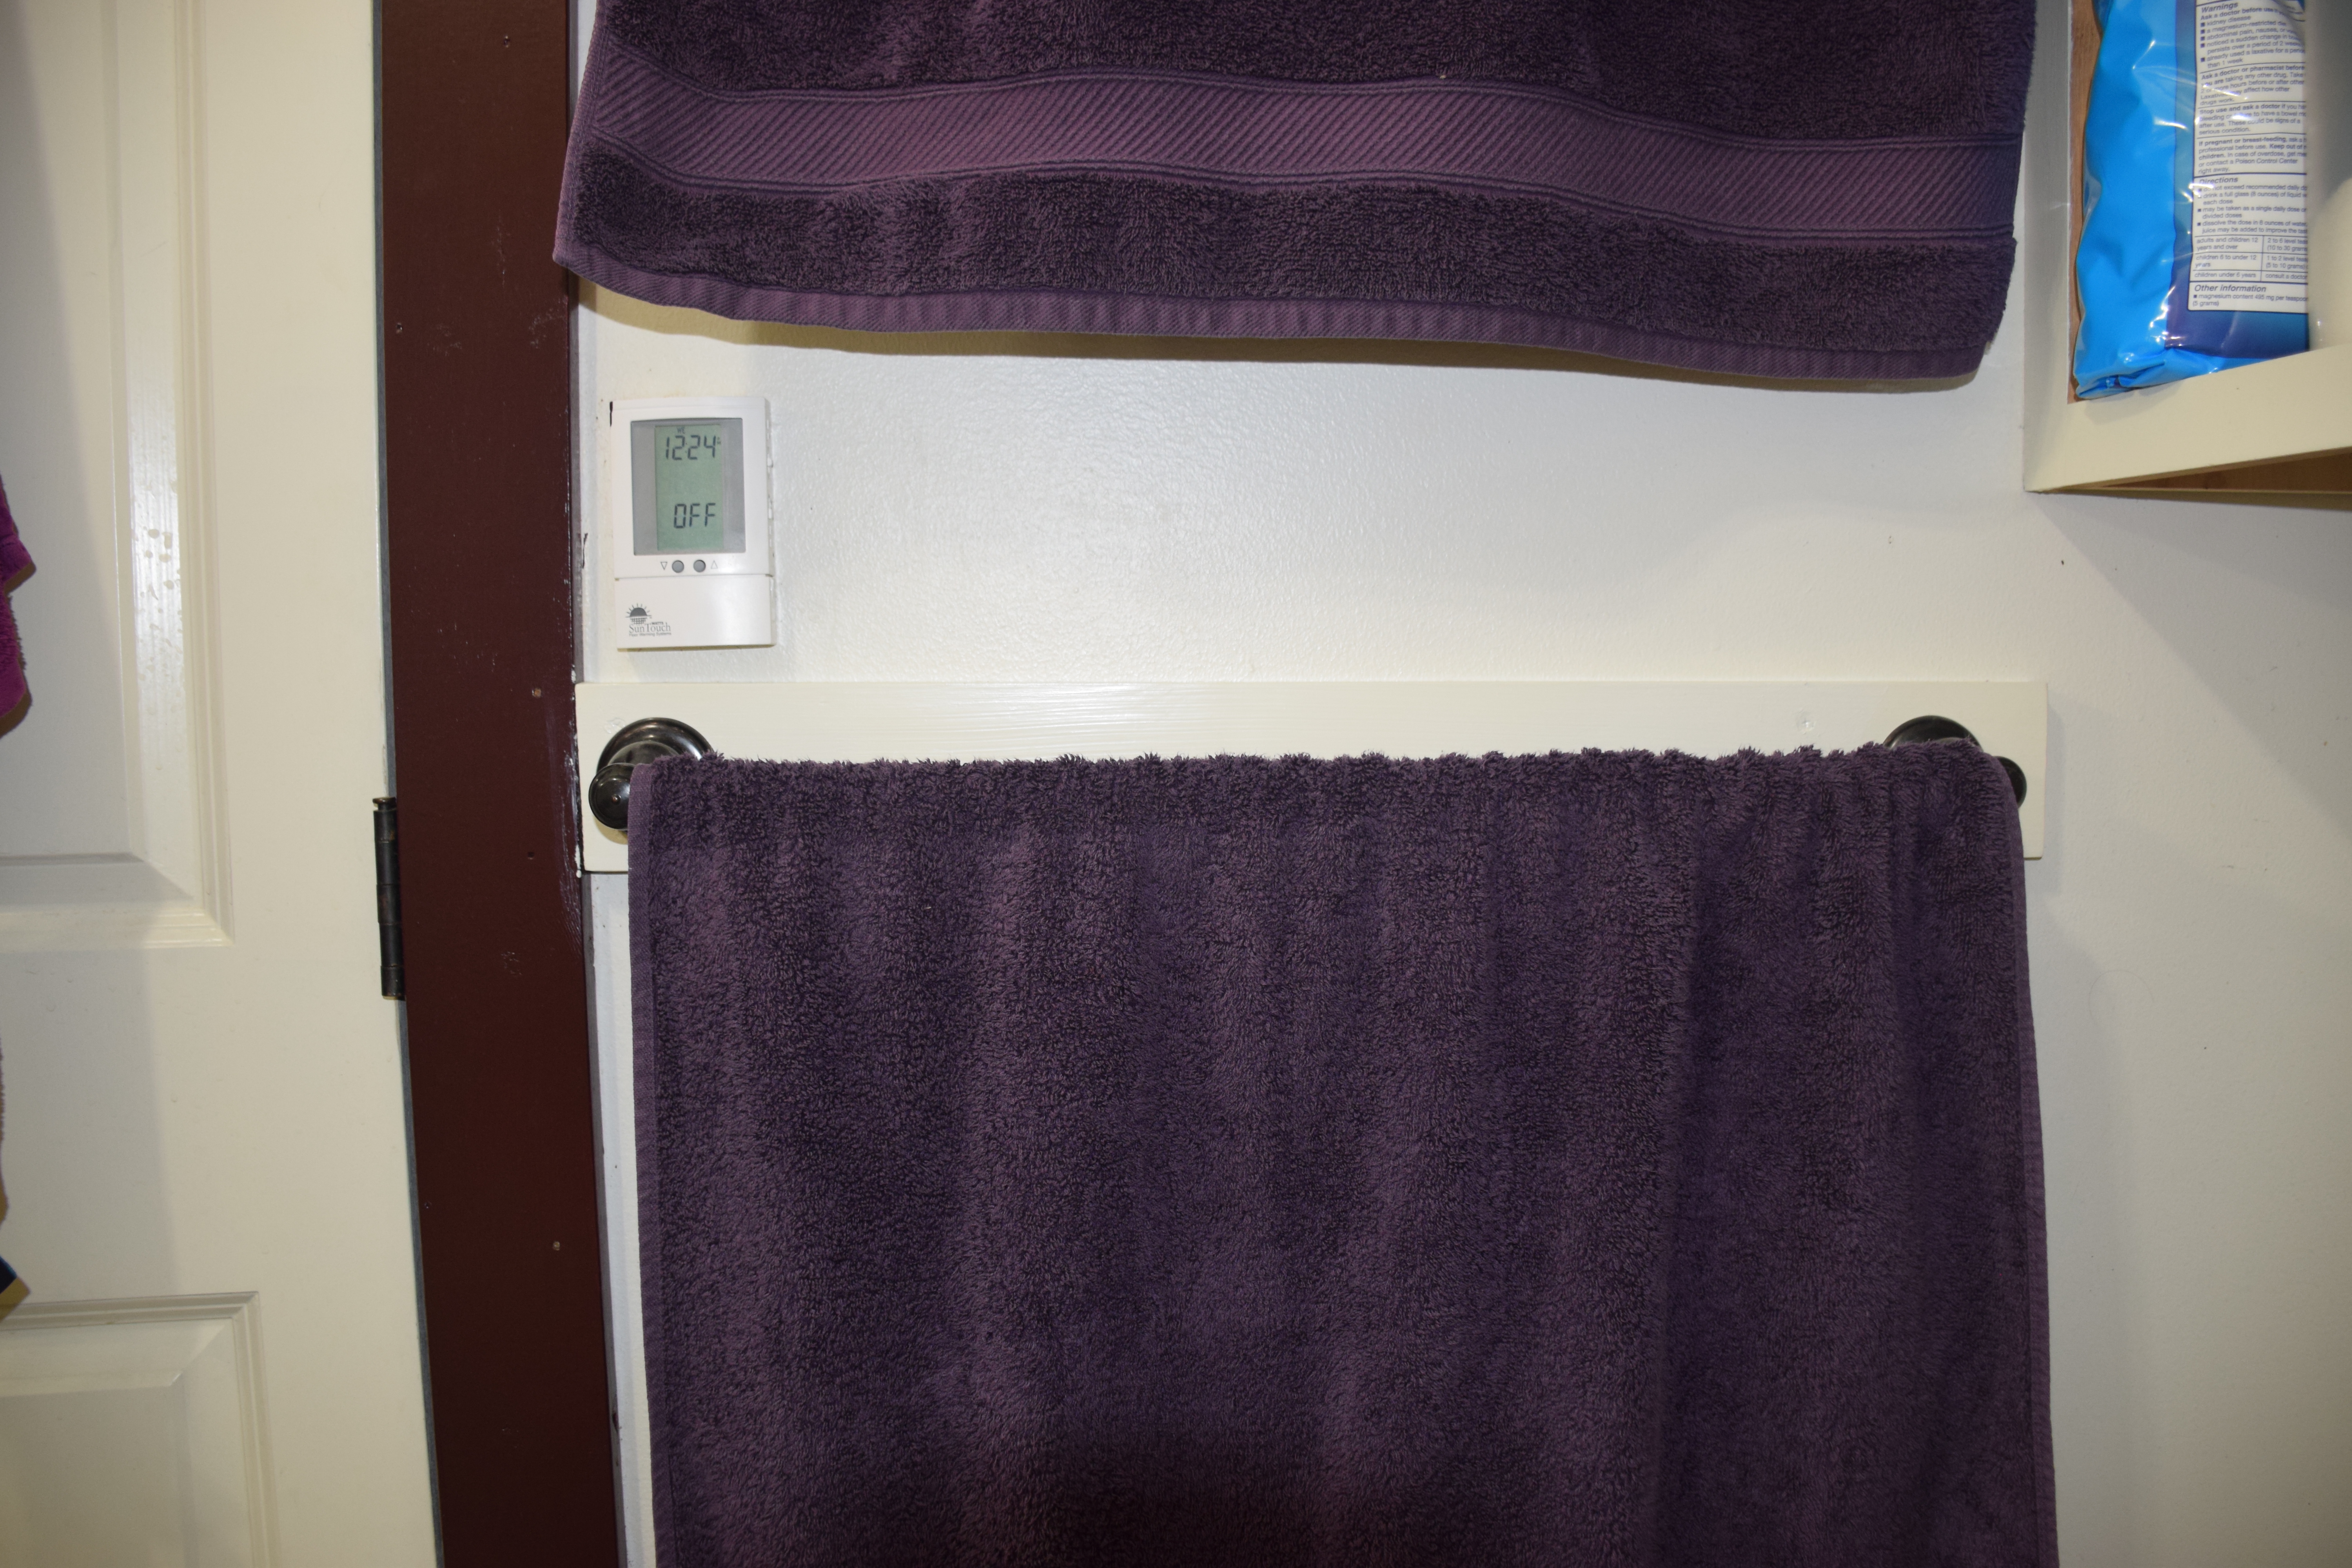 Installed Towel Rod with Towel |
 Before: original anchor ripped out. |
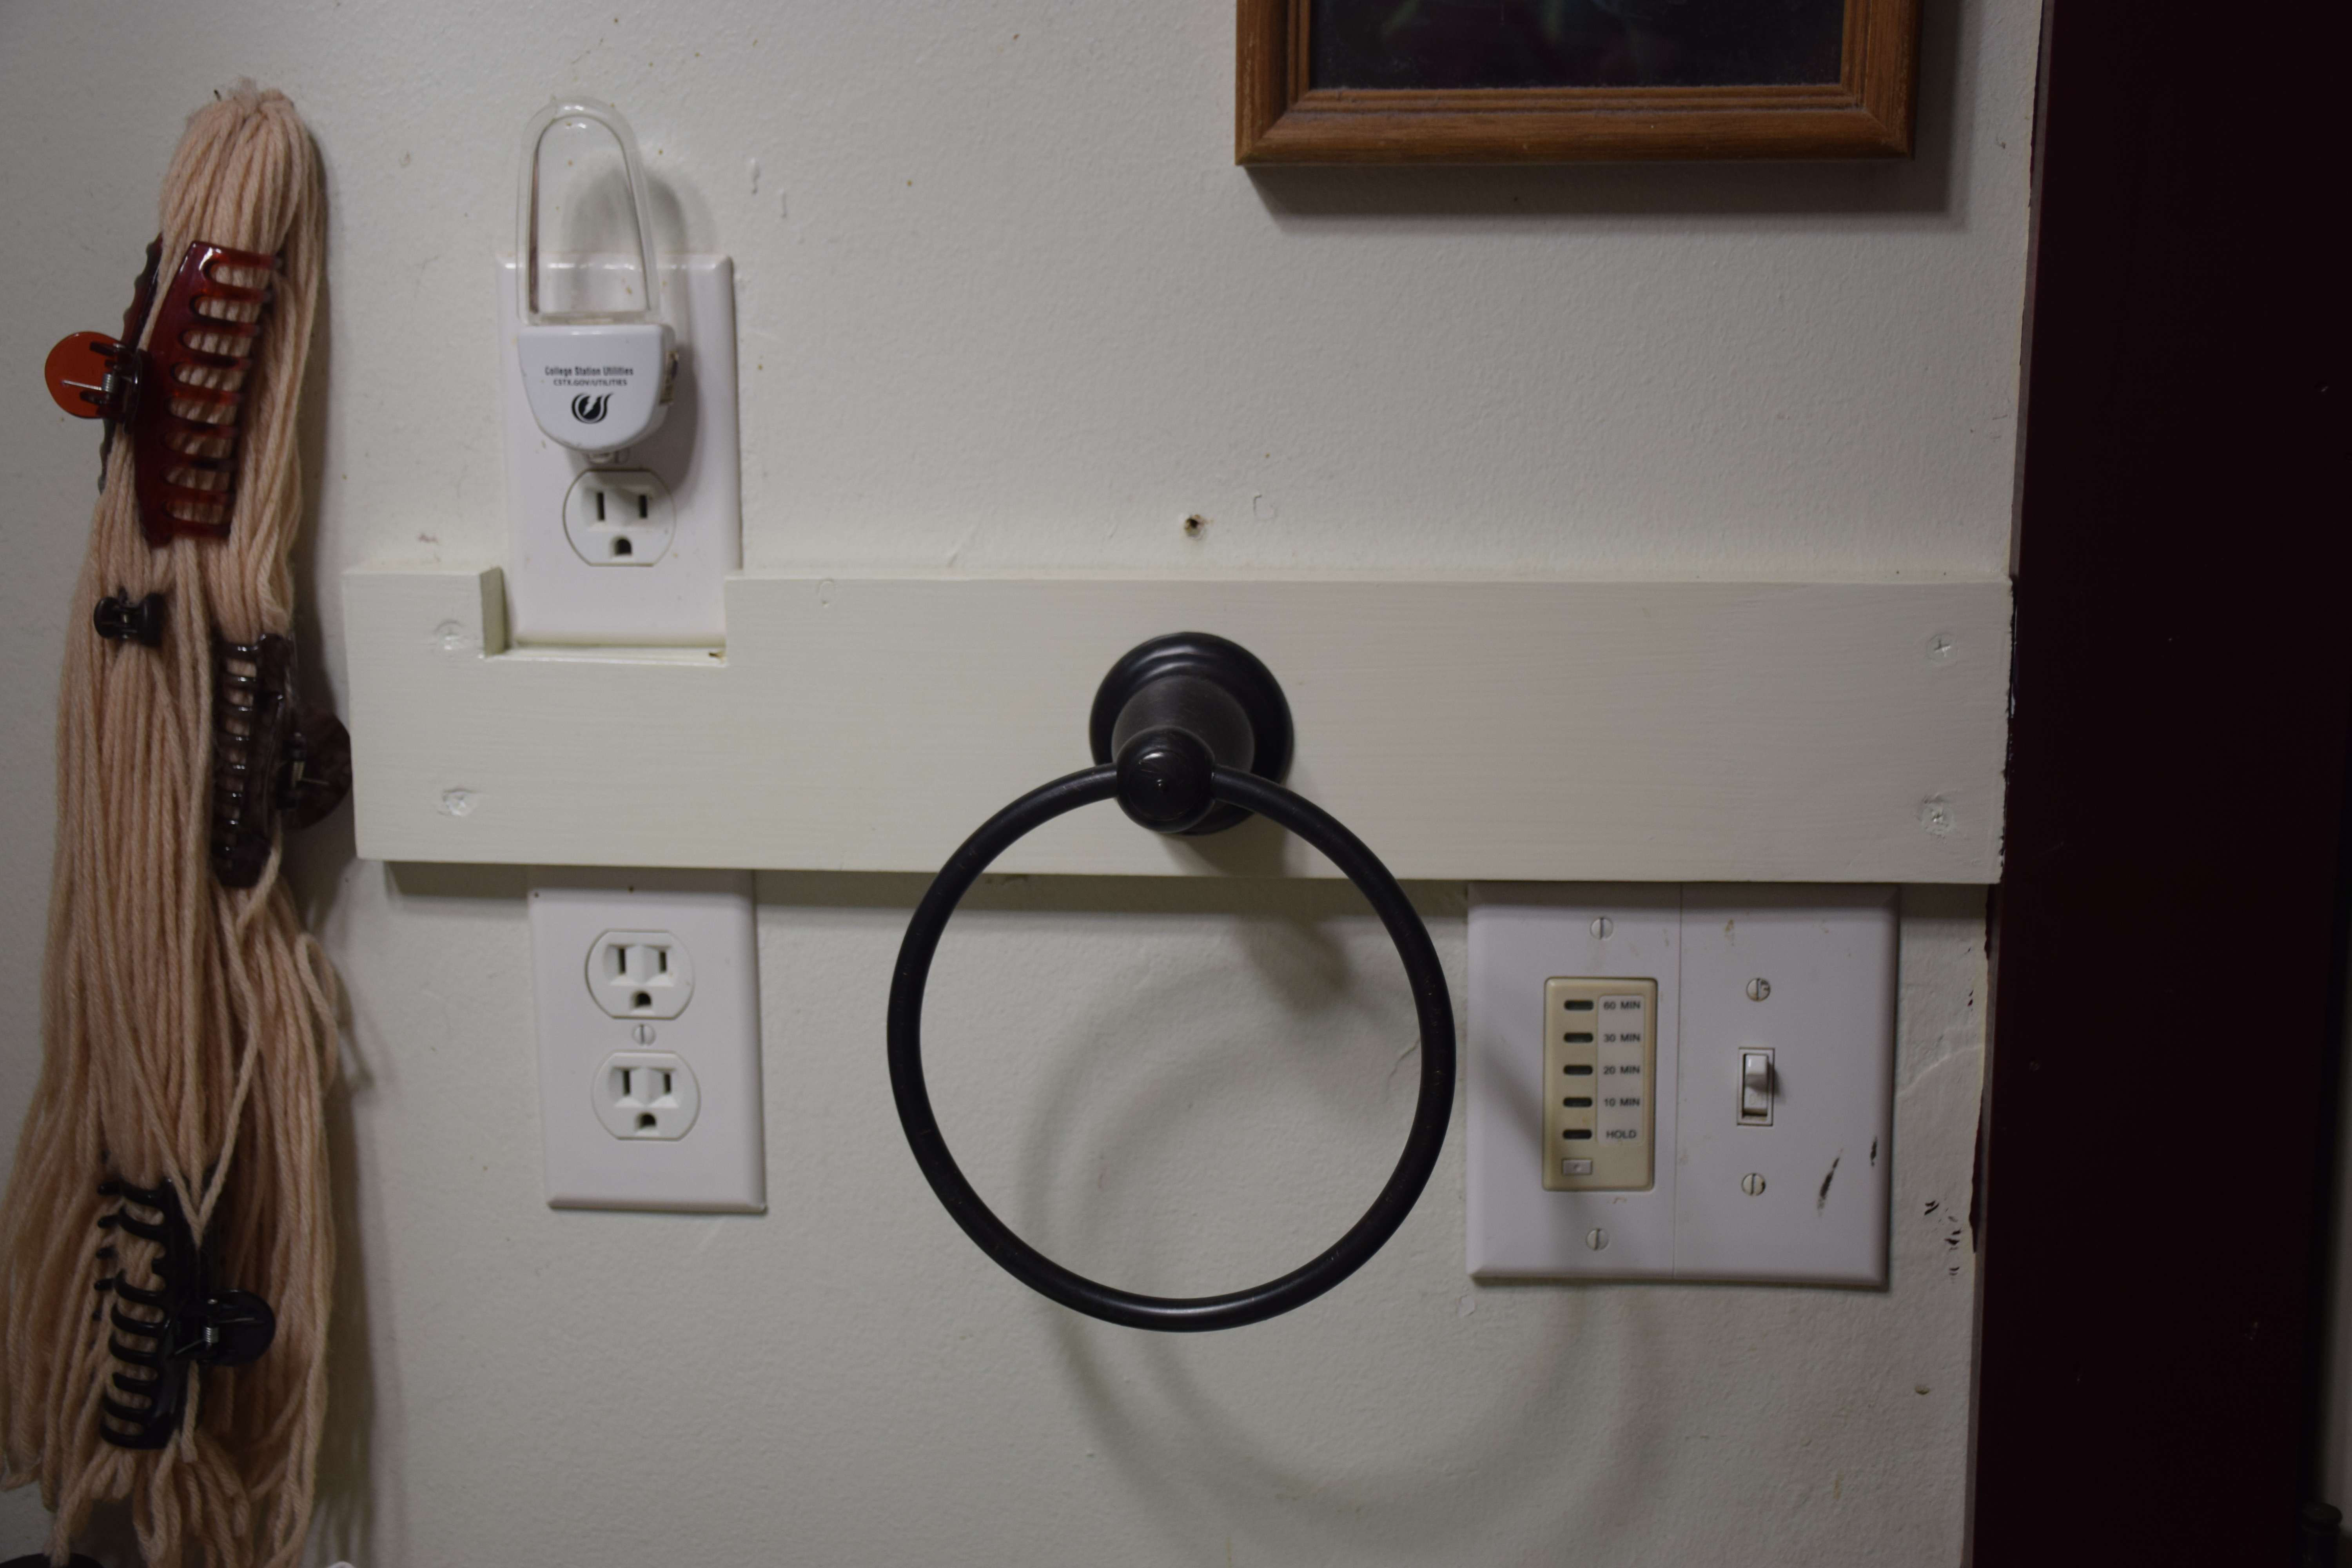 Hand Towel Ring Installed |
 Hand Towel Ring with Towel |
Alan Hill
alan@alanswebdesigns.com979-218-1554
I am the webmaster for the following web pages
www.lonestartireservices.comwww.pioneertransportdallas.com